November 27th, 2013
How to keep an installation up forever – Part 2
This is a new post following my previous article: How to keep an installation up 4evr
In this addendum, I’m going to outline some new tricks you might find useful for keeping long running installations going – or at least so you can keep an eye on them. I’m keeping an eye on 3 separate, complex installations at work right now so I needed some new tools to make sure everything is running smoothly. Please let me know if you have any new tricks to add in comments below!
Most of the tricks try to avoid third party software and just use the base OS X/Unix tools available as they would (hopefully) be the least error prone methods and sure to work with the system you’re on.
1. Process Logger
If you have an installation that runs for weeks or months, you might want a way to keep tabs on it that doesn’t involve remotely logging in and checking on it. A good thing to have would be to have something on the system that writes certain info to a text file (kept on a linked Dropbox), or better write that file to a web server that you can then check.
There are a couple things you can do depending on what you want to know about the state of your installation.
There is a terminal command you can use to get a list of all of the currently running processes on your computer:
ps aux (or ps ax)
(more info above ps commands here) – Further more you can filter this list to only return applications you’re interested in learning about:
ps aux | grep "TweetDeck"
This will return a line like this:
USER             PID  %CPU %MEM      VSZ    RSS   TT  STAT STARTED      TIME COMMAND
laser          71564   0.4  1.7  4010724 140544   ??  S    Sun03PM  14:23.76 /Applications/TweetDeck.app/Contents/MacOS/TweetDeck -psn_0_100544477
laser          95882   0.0  0.0  2432768    600 s000  S+   12:11PM   0:00.00 grep TweetDeck
Now you have the following useful info: CPU usage, Memory usage (as percentage of total memory), Status, Time Started, Time Up
All that is left is to write this output to a text file, which you can do with a line like this:
ps aux | grep 'TweetDeck' >> /Users/laser/Dropbox/InstallationLogs/BigImportantInstall/Number6ProcessLog.txt
Now we just need to make this an executable shell script and set it up as a launch daemon or cron job – see the previous article at Step 3 to learn how to run the shell script at a regular interval using Lingon and launchd. If the app isn’t running, it will only return the “grep YourAppName” process which is a good thing to log because if your app isn’t open you won’t know how long it’s been out (nothing will be logged), but having the grep process logged will at least tell you it was checking for it. Grep will also more accurately tell you what time it checked – the other app will only give you a start time and up time.
Let’s also take this one step further and say, hypothetically, that the Triplehead2Go display adapter you have is fairly wonky and you don’t always get the displays or projectors to connect after reboot – or maybe a projector is shutting itself off and disrupting things. Well we can log the currently available resolutions too! Try entering the line below in your own terminal:
system_profiler SPDisplaysDataType
This will return a list of connected displays and some metadata about them including resolution and names.
Let’s say you want to make sure you’re running a resolution of 3840×720 at all times…or you want a log of resolution changes. You would do something like:
system_profiler SPDisplaysDataType | grep Resolution
This will return “Resolution: 3840×720” which you can combine with the above lines to write it all to a text file. So here would be your shell script file if you wanted to record the currently running processes and the current resolutions:
#!/bin/bash
ps aux | grep 'YourAppName' >> /Users/you/filepath/Install6ProcessLog.txt
system_profiler SPDisplaysDataType | grep Resolution >> /Users/you/Dropbox/Install6ProcessLog.txt
And now you’re feeling excited, maybe you want to grab a fullscreen screenshot at a regular interval too, just to make sure there is no funkiness happening that you can’t see…well you could add this line to the above as well:
screencapture ~/Desktop/$(date +%Y%m%d-%H%M%S).png
This will save a screenshot to the desktop (specify your own file path) with a formatted date and time. You may want to do this every hour instead of every 5 minutes since it’s a big chunk of data and it may cause some issue with your screens. As usual – test before deploying!
Bonus points would be to create an auto-generated table and webpage that takes all of this info and puts it into a nice view that you can use to check all of your installations at a glance.
2. Email Yourself on crash or other behavior
If the process logger isn’t enough, we can use what we learned in that process to actually set up a system to email you if something is amiss so you don’t have to manually check it. We can do this all with the command line and internal tools, it’s just a more involved setup. This is going to be fairly general and will need some tuning in your specific case.
First you will need to configure postfix so you can easily send emails from the terminal – follow the instructions here as closely as possible: http://benjaminrojas.net/configuring-postfix-to-send-mail-from-mac-os-x-mountain-lion/
If you were using a gmail account you would do:
InstallationSupport@gmail.com
pass: yourpassword
The line in the passwd file mentioned in the article would be: smtp.gmail.com:587 installationSupport@gmail.com:yourpassword
Now send a test email to yourself by running: echo “Hello” | mail -s “test” “InstallationSupport@gmail.com”
Second step is to combine this new found ability to send emails from the Terminal with a process to check if your application is still running…something like the below would work with some tweaking for what you’re looking to do:
#!/bin/sh
if [ $(ps ax | grep -v grep | grep "YourApp.app" | wc -l) -eq 0 ] ; #Replace YourApp.app with your own app's name
then
    	SUBJECT="Shit broke"
    	EMAIL="InstallationSupport" #this is the receiver
   	 EMAILMESSAGE="This could be for adding an attachment/logfile"
   	 echo "The program isn't open - trying to re-open">$SUBJECT
   	 date | mail -s "$SUBJECT" "$EMAIL"  "$EMAILMESSAGE"

    	echo "YourApp not running. Opening..."

    open /Applications/YourApp.app #reopen the app - set this to an exact filepath
else
    echo "YourApp is running"
fi
Now you just need to follow the instructions from Step 3 in the other article to set this shell script up to run with launchd – you can check it every 5 minutes and have it email you if it crashed. You could also adapt the If statement to email you if the resolution isn’t right or some other process condition.
3. Memory leak murderer
See this article about combining the above process with something that kills and restarts an app if it crosses a memory usage threshold
Bonus – if using MadMapper – see this link for an AppleScript that will open MadMapper and have it enter fullscreen – and enter “OK” on a pesky dialog box.
November 24th, 2013
Commercial Work – Page 1
This post is a sample of the large scale and commercial work I have done as the lead creative technologist at Fake Love in NYC
Lexus – Trace Your Road – Life Sized Video Game – Rome, Italy – 2013
My role: I was one of the lead technical developers and designers for this piece, along with Dan Moore and Ekene Ijeoma. Programmed in openFrameworks on OSX and iOS.
Lexus | TRACE YOUR ROAD | Director’s Cut from Fake Love on Vimeo.
——————————–
AmEx Instagram Towers – Fashion Week – Lincoln Center, NYC – 2012
My role: Lead technical architect on the hardware and interaction, also programmed by Caitlin Morris Made with openFrameworks.
Amex Fashion Week Instagram Towers from Fake Love on Vimeo.
———————————
NY Pops Gala 2012 – Interactive Conductors Baton – Carnegie Hall, NYC – 2012
My role: I was the programmer and tech lead on this project. Devised the tracking system, custom baton, software and design. Made with openFrameworks and Max/MSP/Jitter
NY Pops | Gala 2012 from Fake Love on Vimeo.
———————————-
Google Project Re:Brief Coke – Interactive Vending Machine – Worldwide – 2011
My role: I was the lead tech for the installation/physical side of this project (another company did the banners and web server portion). I did the vending machine hacking, setup and programming in New York, Cape Town, Mountain View and Buenos Aires. This project went on to win the first Cannes Lions mobile award. Other programming and hardware hacking by Caitlin Morris, Chris Piuggi, and Brett Burton. Made with openFrameworks.
Project Re:Brief | Coke from Fake Love on Vimeo.
—————————-
Shen Wei Dance Arts – Undivided Divided – Park Avenue Armory, NYC – 2011
My role: Lead projection designer, programmer, and live show visualist. I designed the entire 12 projector system for this Shen Wei premiere at the Park Avenue Armory. I also programmed and maintained the playback system for the 5 night run of the show. Made with Max/MSP/Jitter and VDMX
Shen Wei | Park Avenue Armory from Fake Love on Vimeo.
——————————-
Shen Wei Dance Arts – Limited States – Premiere – 2011
My role: Lead projection designer, programmer and live show visualist. I designed the playback and technology system for this new piece by choreographer Shen Wei. I also contributed heavily to some of the visual effect programming seen in some of the pre-rendered clips. Made with Max/MSP and VDMX.
Shen Wei – Limited States from Fake Love on Vimeo.
——————————–
Sonos – Playground and Playground Deconstructed – SXSW and MOMI NYC – 2013
My role: I was the technical designer of the hardware and projections for this audio reactive immersive piece. Red Paper Heart was the lead designer and developer on this project which they made with Cinder.
PLAYGROUND DECONSTRUCTED from Fake Love on Vimeo.
September 19th, 2013
Applescript to automatically fullscreen Madmapper for installations
This is a simple Applescript that I used with a long running installation that required Madmapper for doing some precise mapping. More info on keeping long running installations going is here: http://blairneal.com/blog/installation-up-4evr/
This script would be used on reboot to both open your Syphon enabled app and to open your madmapper file, open it, select fullscreen, and then hit OK on the dialog box.
It requires you to set your own file path in the script for your madmapper file and application file.
To use the code below:
1. Open Applescript and paste it into a new file
2. Change the filepaths and resolution so they match how it appears in your setup (ie resolution may be 3840×720 instead)
2. Go to “File -> Export” and select “Application” as your file format
3. In System Preferences -> Users & Groups -> Login items drop your applescript application in there to automatically launch on boot
You can also add in pauses (for things to load) and other checks with applescript if necessary.
This script will fail if for some reason the resolution has changed on boot or something – if the text doesn’t match exactly how it is in the Output menu of madmapper, it won’t work.
NOTE: I personally do not recommend using Madmapper for long running installations – there are occasional issues with it losing keyboard focus and it can appear as if your machine has locked you out if accessing it remotely. It’s also typically best practice to try and keep everything simplified into one application so you can minimize weird occurrences. In the case that we had to use this, there was not enough development time to add in the mapping code that was necessary.
tell application "Finder" to open POSIX file "YourInstallationApp.app" --add your absolute file path to your application

delay 10 --wait 5 seconds while your app loads up

tell application "Finder" to open POSIX file "/Users/you/yourmadmapperfile.map" --absolute filepath to your madmapper file

do_menu("MadMapper", "Output", "Fullscreen On Mainscreen: 1920x1200") --change this line to your determined resolution

on do_menu(app_name, menu_name, menu_item)
	try
		-- bring the target application to the front
		tell application app_name
			activate
		end tell
		delay 3 --wait for it to open
		tell application "System Events"
			tell process app_name
				tell menu bar 1
					tell menu bar item menu_name
						tell menu menu_name
							click menu item menu_item
							delay 3 --wait for Is fullscreen OK? box to appear
							tell application "System Events" to keystroke return
						end tell
					end tell
				end tell
			end tell
		end tell

		return true
	on error error_message
		return false
	end try
end do_menu
June 12th, 2013
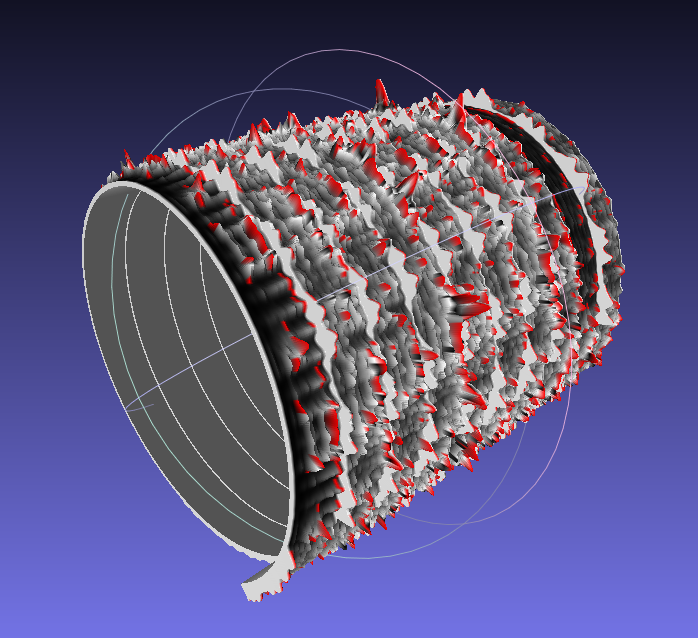
Sonic Prints
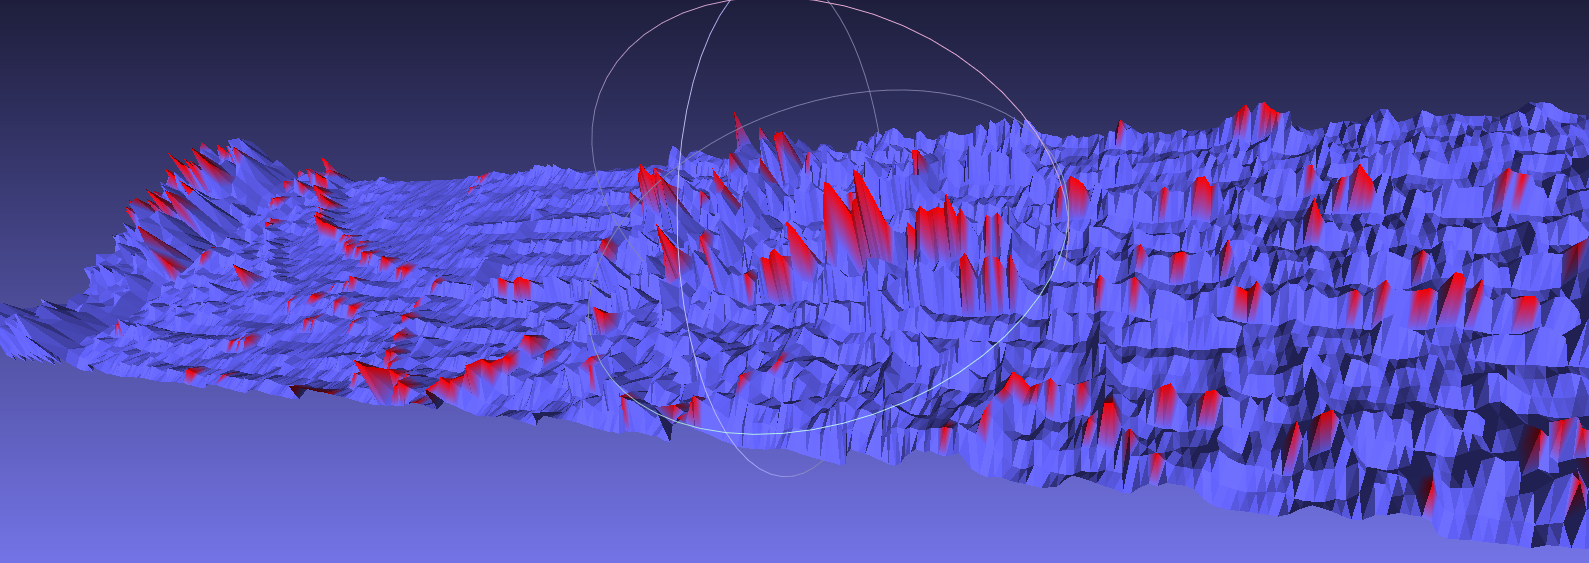
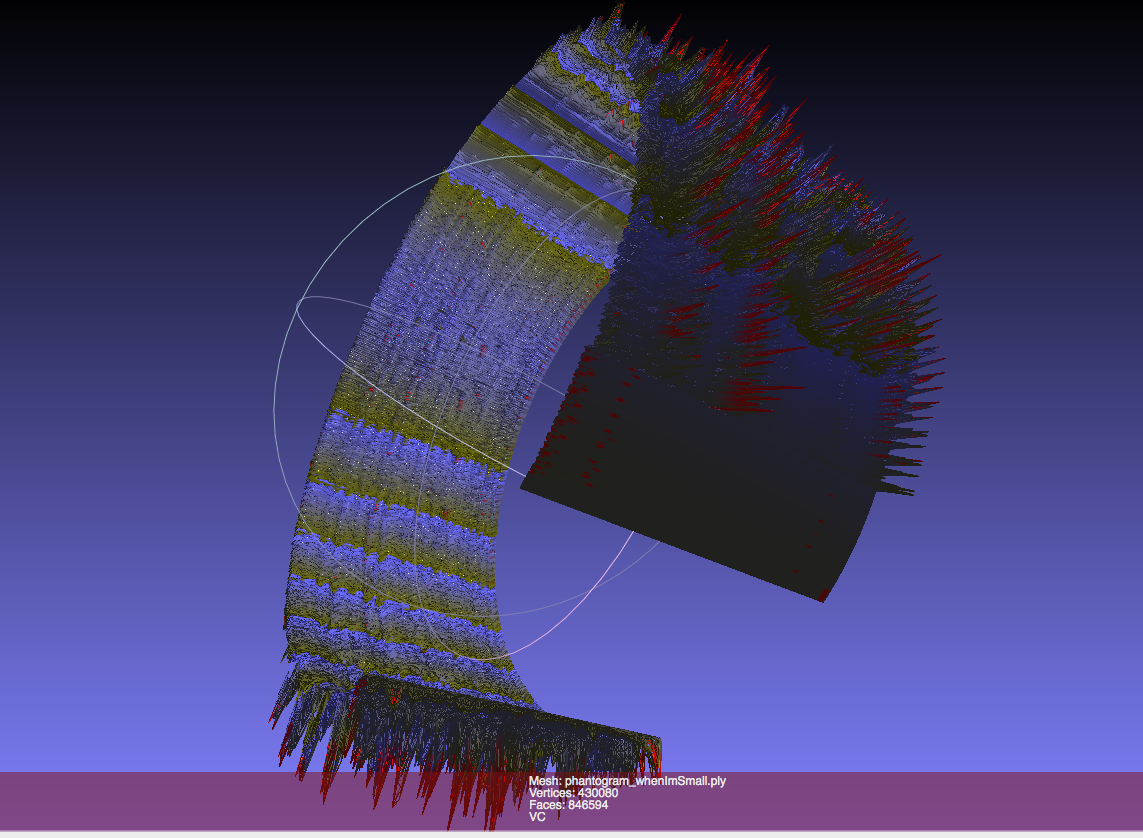
Using openFrameworks and ofxFFT to generate 3D Meshes of sound data for use in 3D printing.
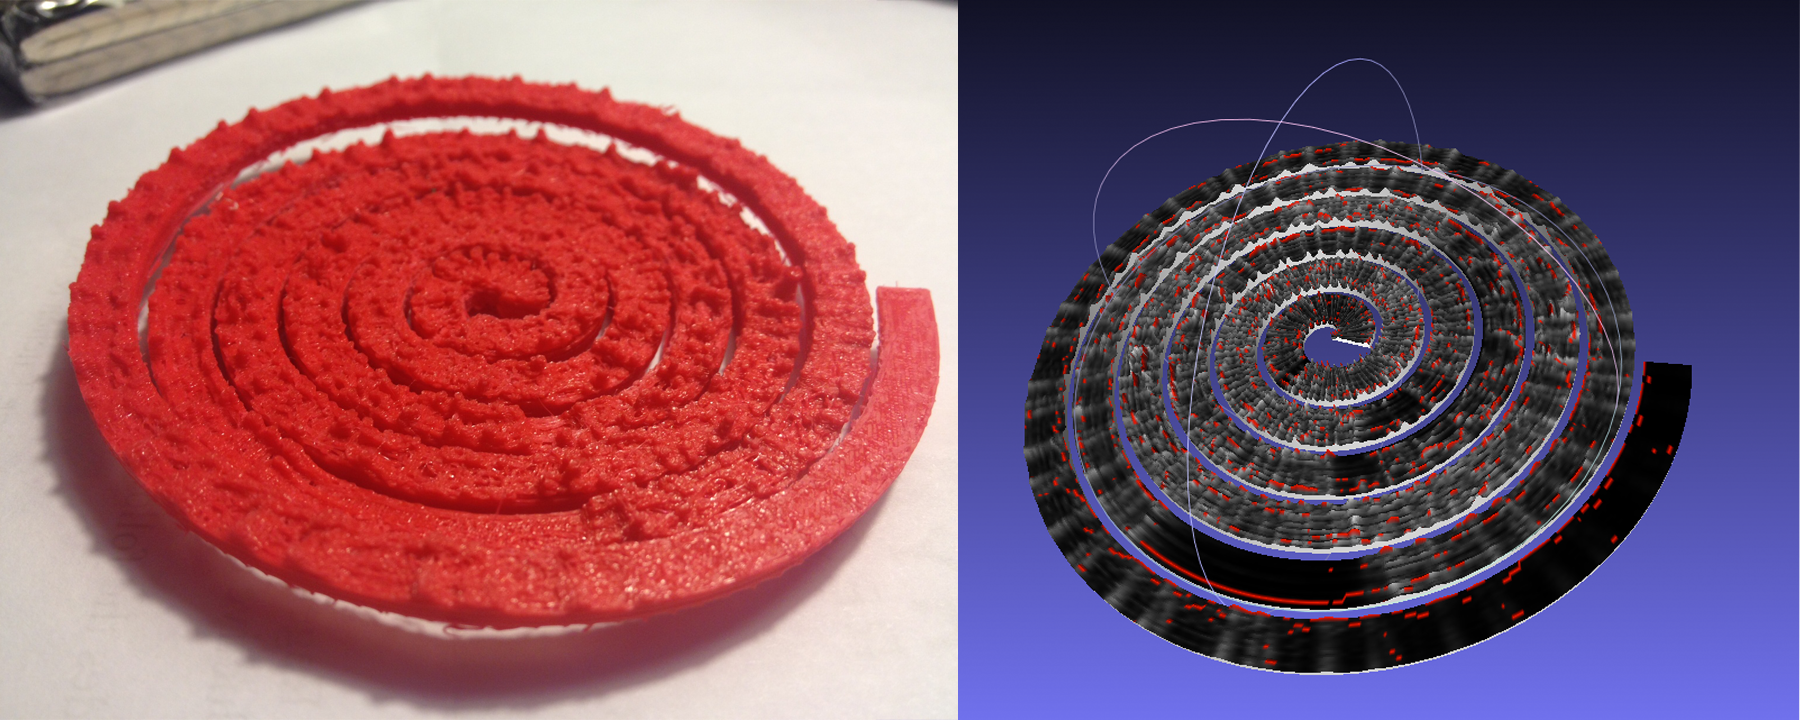
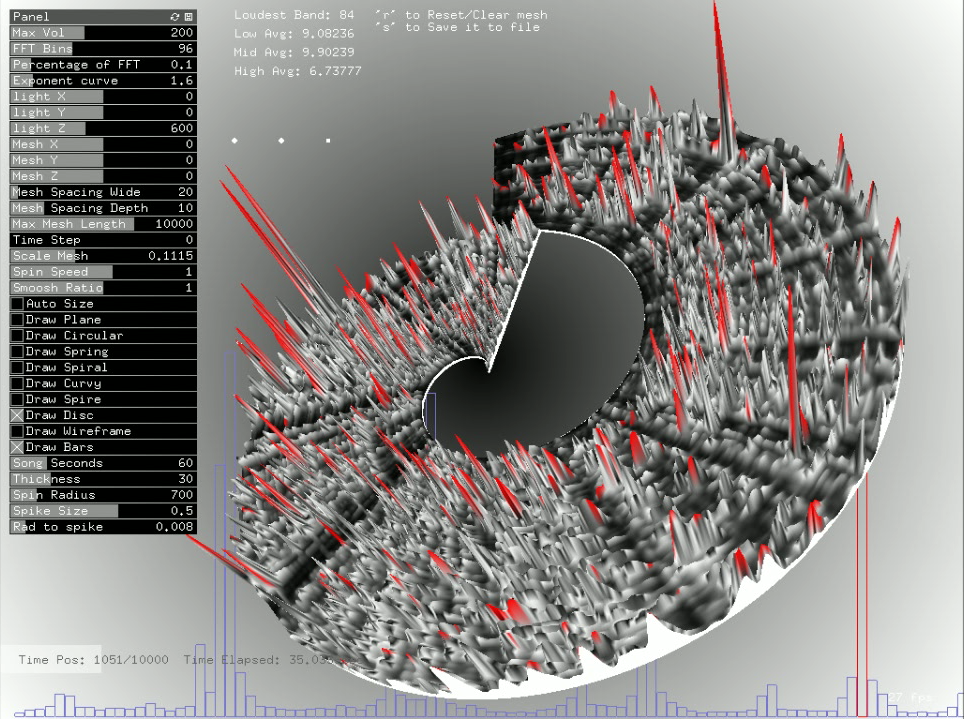
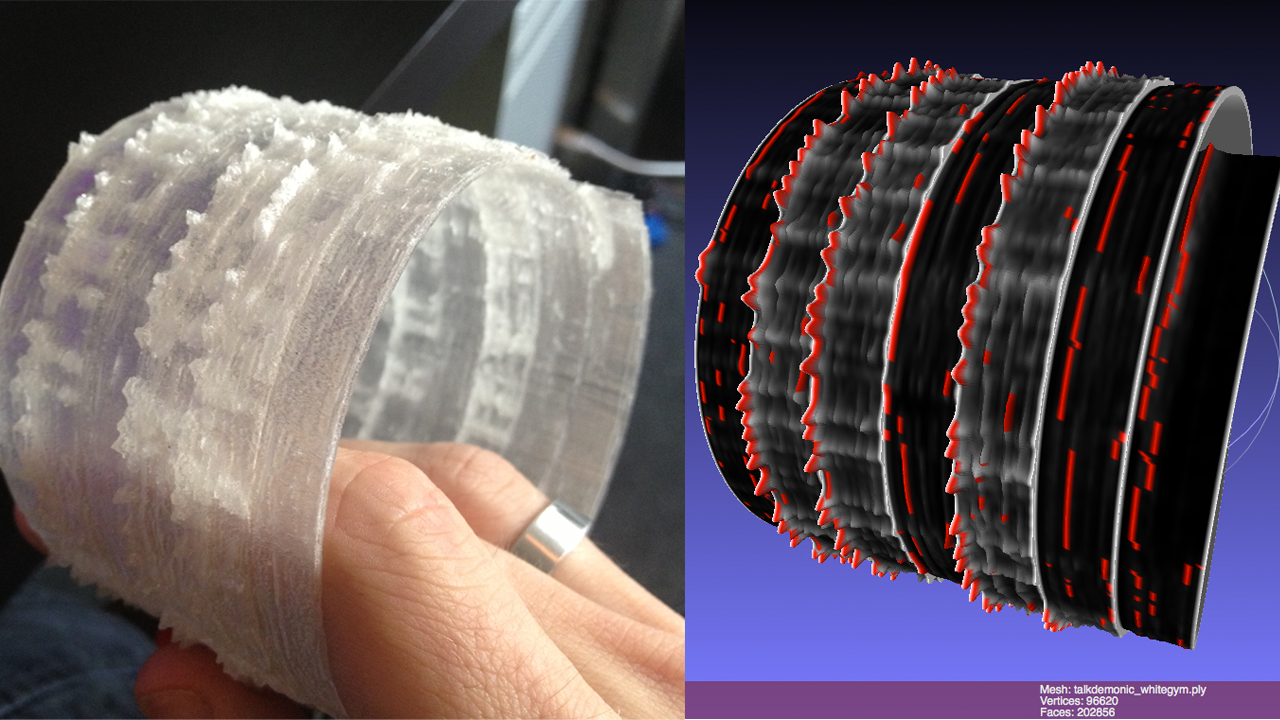
This is very much a work in progress, but just wanted to share some initial results while I work on the final visual output. I have done some initial prints (see below) but have found that I’d like to make some much larger prints to be able to really get the detail out of the generated models. This project is interesting for me because it allows me to look at the structure of a song in a different way than a musical score or just a volume intensity graph like we’re used to. I can also play with the idea of making physical objects out of songs in a different way than burning a CD, pressing a vinyl or etching a wax cylinder.
We will be releasing the source after I get rid of a few bugs and clean a few things up, just need time to make those adjustments. Then you’ll be able to tweak it and make your own 3D meshes for your own real-time music and sound input.
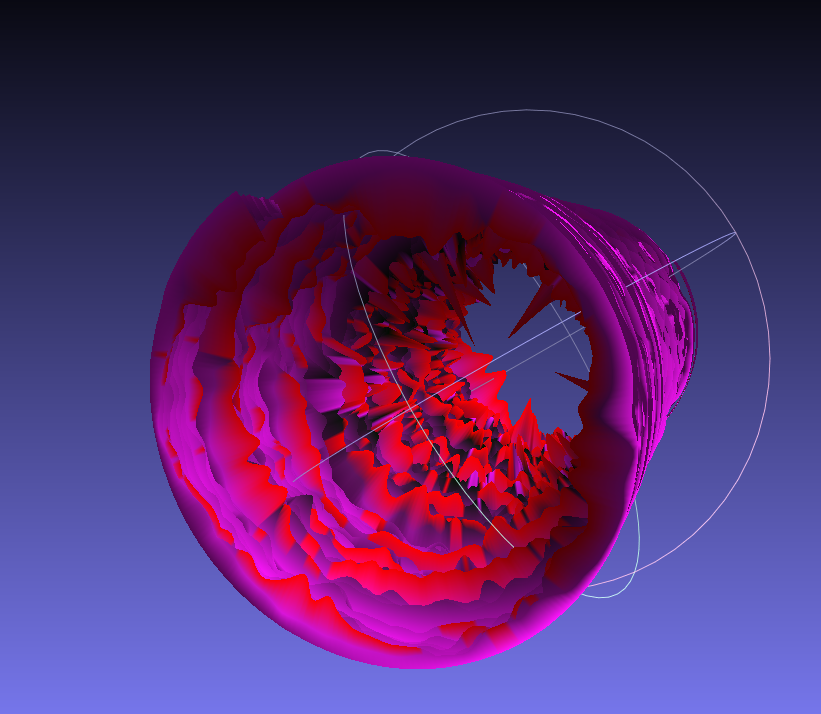
The meshes are set up like this: left is generally the bass/low end, right is high end. Red or orange marks are the loudest frequency band at that particular time. White to black shows the relative volume intensity of the particular time. I can adjust the number of frequency bands it is looking at and make it more coarse or fine.
If you would like one of the 3D mesh files to look at for yourself, I can send you a sample. The individual files are about 20mb so I don’t want to host them here yet.
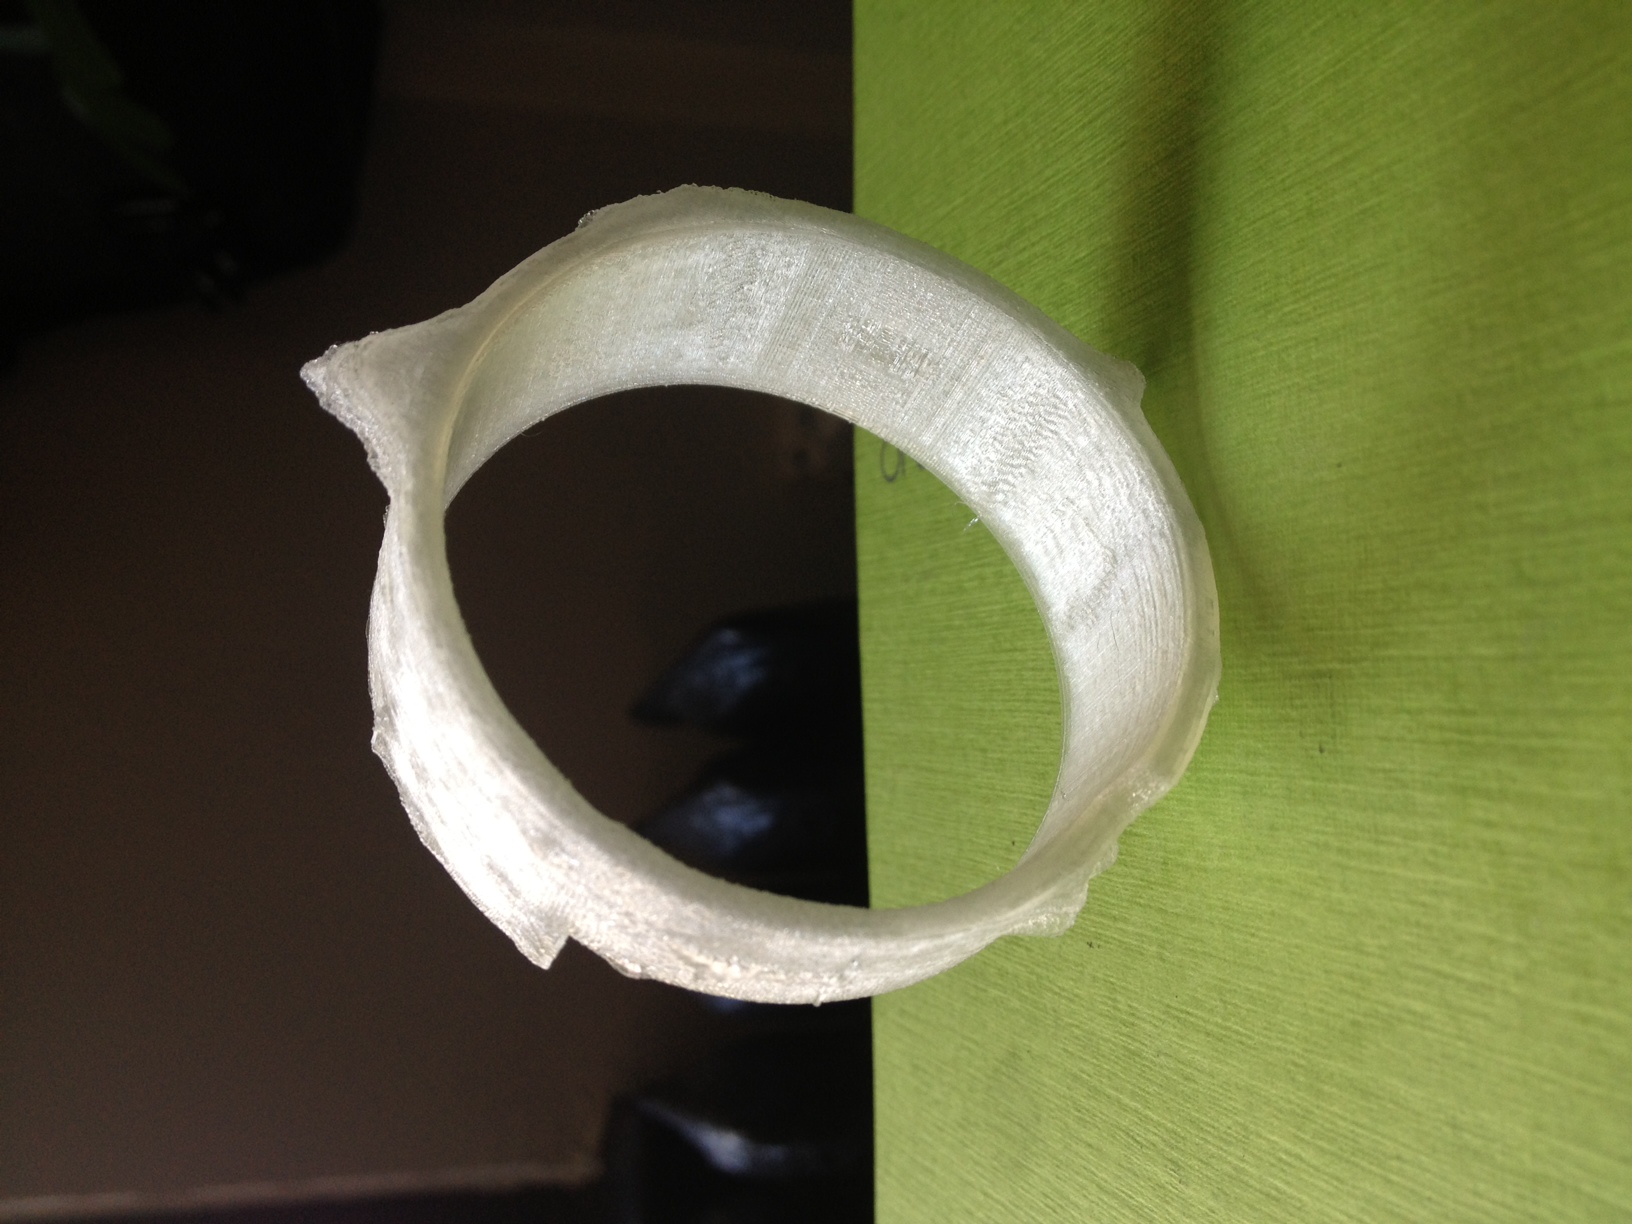
You can see some images of sample prints below, they are about the size of a bangle or bracelet.
Sample prints now available on Thingiverse
I have been doing this as a personal project and a side project where I work: www.fakelove.tv
3DFFT Sonic Prints – Work in Progress from blair neal on Vimeo.

3DFFT _Sonic prints example – Son Lux – “Easy” from blair neal on Vimeo.
March 27th, 2011
Quick update
Haven’t posted much in a while. I recently completed some touring visuals for Hooray for Earth and got to play with them live here in Brooklyn. I also just wrapped up a music video for Banjo or Freakout’s song Idiot Rain which will be debuting any day now. Here is a screenshot of that:

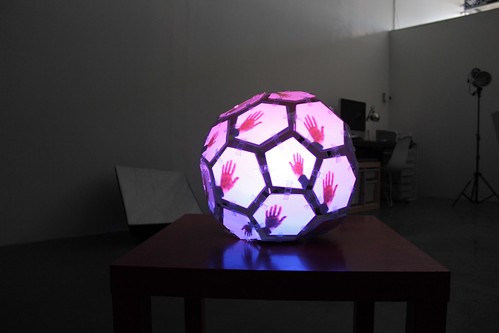
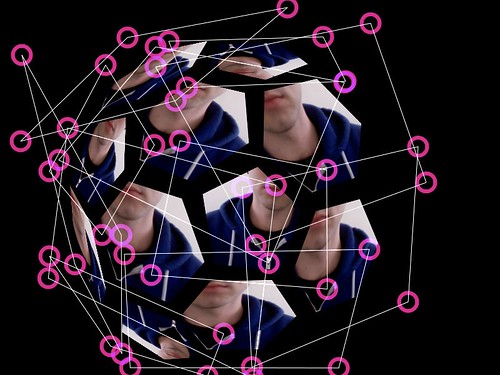
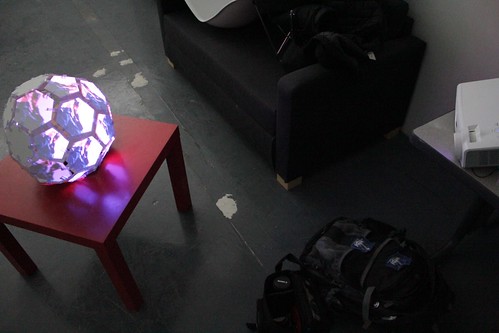
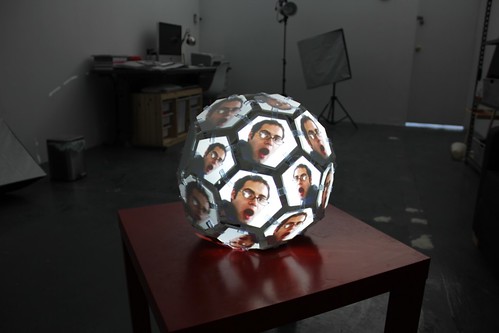
Slowly putting together something for a sort of “projection mapping how to” to the best of my abilities. In the meantime, I’ve been working on my own projection mapping project with a buckyball shape. Building everything in quartz composer with a lot of Kineme and 1024 plugins…then eventually will farm everything out to VDMX for any other live elements. I’ll hopefully be able to share any useful pieces I make as well, but the kineme and 1024 things make stuff work so nicely already that it’s hard to improve anything. Here some pics of what I’ve got as some test setups:
And the rest here
October 19th, 2010
Jitter example: Lightpainting
In this example, I’m giving you code to do live interactive light painting. The typical way to do this is by taking several extended exposure photographs which are then sequenced into a stop motion video. My method uses jitter to isolate the brightest parts of the scene and then applies additional processing to make it a more interesting experience. Once again, the patch is extremely commented, but let me know if you’re stuck on something. I made the patch for an image processing class originally, so I have some detailed documentation of it. Below the download is a series of images detailing the processing steps to get the lightpainting effect.
Lightpainting example (1535 downloads) (Right click and choose “Save As”)
Click images for full sized version:


September 12th, 2010
Color a Sound reimagined
I have been sharing the code for my piece Color a Sound with whoever contacts me. Today I just got a message about someone who successfully made their own version of the patch and added an extra color! Check out Cedric’s awesome video below:
September 1st, 2010
Color a Sound
Color a Sound is an installation that uses an overhead projector, a camera and a laptop to allow the user to draw whatever they’d like and roll it past a point and have it trigger sounds, player-piano style. Red, green and blue control three different octaves, or different sound sets (I use blue to control a set of 808 drum sounds in the example video). The rolls used to draw could be played forward or backward, and people could play previous compositions made from past users. Everything is programmed in Max/MSP/Jitter. The code used will be available soon once I clean it up a little more.
I originally came up with the idea for the piece in 2008 and developed it for a Sound Art class I was in. It is very similar in concept to the color organ instruments that were developed in the early 1900’s, except in those instruments, artists were trying to represent sounds with colors. Color a sound for me is more of a playful comment on the naive idea of trying to represent such complex sounds with simple colors, and is more of a debunking of synesthesia than a champion of it.
The installation could have been more complex, employing more colors/motion tracking/dynamics sensing and a full chromatic range but I kept the interaction simple so it was something a child could figure out. Even with only three colors, one could just scribble something and have it make a quick melody, or actually sit down and make a rather complex composition.

Download the unorganized patch: Color a sound demo (993 downloads)
3 Comments »