November 2nd, 2014
We’re Live – Live TV Face Substitution
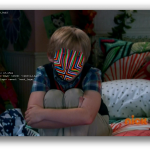
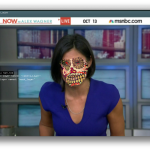
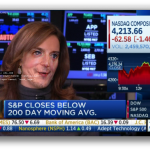
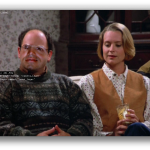
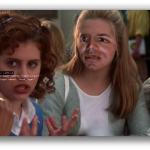
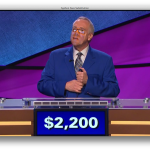
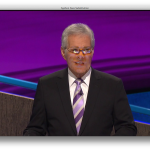
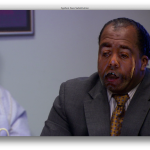
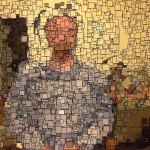
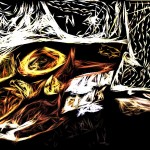
We’re Live is a project involving live HD cable TV and face substitution software. It is a hardware and software method for doing a real time facial composite/replacement on live television. The original face substitution implementation and cloning shader was created by Kyle McDonald and Arturo Castro in 2012 (link to Github source). The face tracking algorithm that enables this kind of high quality facial substitution was developed by Jason Saragih.
One of television’s greatest powers is in its ability to display very structured and edited views of reality. By watching the fabricated streams of the shows, viewers begin to wish for the interesting, exciting and impossible lives of the characters. They can subconsciously desire the smiles and trouble free lives enabled by buying the products in the advertisements. With this software, viewers can come one step closer to truly seeing themselves on screen.
We’re Live allows a user to composite their face (or any face they choose) onto a live television stream. Essentially, anyone you watch on TV can finally look like you….or anyone you want. You could make everyone on TV look like Bill Murray if you really wanted to.
Download of the software is available in the Technical details section

We’re Live – Live TV Face Substitution from blair neal on Vimeo.
————
Technical details/process:
The first part of the process involves actually getting the live TV into your computer so you can process it for face substitution. I have been using the following:
Blackmagic Mini Recorder
Orei 1×2 HDMI Splitter – strips HDCP
Alternate to the Orei Splitter
The HDMI Splitter is the silver bullet for actually capturing live TV off a digital set top box. Most set top boxes and game consoles have what is called HDCP or High Definition Copy Protection which blocks you from…well…copying or recording the HD signal which is something we could potentially do with this setup. The Blackmagic Mini Recorder does not comply with HDCP, so your set top box signal will not even show up when you try to just plug it in straight. Certain HDMI splitters, (like the one listed) will comply with the HDCP handshake on their input, but ignore it for their output – these splitters effectively strip HDCP so you can do whatever you like with the signal.
Once you have Set top box HDMI-> HDMI Splitter -> Black Magic Mini Recorder -> Thunderbolt -> Mac Computer – you can start doing some face substitution!
–DOWNLOAD–
Here is a ZIP of the software with an included VDMX project file for working with it (OSX Only):
Syphon_Face_Sub_v1.0.zip (210 downloads)
Usage:
VDMX is my software of choice for actually getting the captured signal from Blackmagic into the face substitution software. I have included a VDMX Project file with the software to show you how to do this all yourself. With my setup, I am able to get 1280×720 at 60hz (or 720p@59.94 according to the actual capture settings I’m using)
Once I have the TV signal in VDMX, I actually pass the video texture to the face substitution software using Syphon. Once it is in there, it is constantly searching for new faces to map the mask layer onto. You don’t have to use a live TV signal – you can put a movie file into VDMX onto the “camera layer” source and use that layer to apply your masks to.
On another layer in VDMX, you can pass in the “mask” you want to apply to the footage. For example – this would be your face that you pass in via webcam. To save processing time and not run 2 face trackers constantly – I actually have this capture your face on a key press – when your face is in camera – you press the ‘m’ key in the face sub software to set the new mask. You can put still images or movies or a live webcam into the “masks” layer in VDMX. Alternatively – you can put a bunch of files into the “faces” folder in the “data” folder and use the arrow keys to cycle to different faces.
You can press ‘d’ to bring up the GUI for different settings like viewing which mask is currently loaded and things like that.
Recording/Displaying output:
You can capture the output of the openFrameworks program in Syphon as well, and use that to go fullscreen in VDMX or something if you hide those layers. I use the Syphon Recorder to record my demos.
Note about Audio:
Currently nothing in this setup fully supports audio. You can capture audio with the Black Magic recorder and use that as your audio source in Syphon Recorder — but a caveat:
The audio is “ahead” of the video due to input and processing steps – meaning you will hear something 6 frames (0.2s) before you see it (for example – your results may vary). To fix this – you could make an audio delay buffer in something like Max/MSP. If you are recording output with audio – you will need to re-sync it later in your editing software – I recommend a clap board or hand clap at the beginning of recordings – something recognizable for sync in video and audio.
Alternate version/Upgrade: There is an alternate version of the software that isn’t fully integrated yet into this executable/binary (but the source is available on github under the OriginalCycling branch) – which will allow you to map arbitrary textures to the live tracked face. This released current version only allows you to put a face on a face. The other version lets you put more abstract non-face things and map them onto the same area. It works by storing the mesh points of a pre-tracked face, and using those to apply an arbitrary image to the face mesh that is properly texture mapped. This alternate versions also features a way to crossfade between different faces.
November 24th, 2013
Commercial Work – Page 1
This post is a sample of the large scale and commercial work I have done as the lead creative technologist at Fake Love in NYC
Lexus – Trace Your Road – Life Sized Video Game – Rome, Italy – 2013
My role: I was one of the lead technical developers and designers for this piece, along with Dan Moore and Ekene Ijeoma. Programmed in openFrameworks on OSX and iOS.
Lexus | TRACE YOUR ROAD | Director’s Cut from Fake Love on Vimeo.
——————————–
AmEx Instagram Towers – Fashion Week – Lincoln Center, NYC – 2012
My role: Lead technical architect on the hardware and interaction, also programmed by Caitlin Morris Made with openFrameworks.
Amex Fashion Week Instagram Towers from Fake Love on Vimeo.
———————————
NY Pops Gala 2012 – Interactive Conductors Baton – Carnegie Hall, NYC – 2012
My role: I was the programmer and tech lead on this project. Devised the tracking system, custom baton, software and design. Made with openFrameworks and Max/MSP/Jitter
NY Pops | Gala 2012 from Fake Love on Vimeo.
———————————-
Google Project Re:Brief Coke – Interactive Vending Machine – Worldwide – 2011
My role: I was the lead tech for the installation/physical side of this project (another company did the banners and web server portion). I did the vending machine hacking, setup and programming in New York, Cape Town, Mountain View and Buenos Aires. This project went on to win the first Cannes Lions mobile award. Other programming and hardware hacking by Caitlin Morris, Chris Piuggi, and Brett Burton. Made with openFrameworks.
Project Re:Brief | Coke from Fake Love on Vimeo.
—————————-
Shen Wei Dance Arts – Undivided Divided – Park Avenue Armory, NYC – 2011
My role: Lead projection designer, programmer, and live show visualist. I designed the entire 12 projector system for this Shen Wei premiere at the Park Avenue Armory. I also programmed and maintained the playback system for the 5 night run of the show. Made with Max/MSP/Jitter and VDMX
Shen Wei | Park Avenue Armory from Fake Love on Vimeo.
——————————-
Shen Wei Dance Arts – Limited States – Premiere – 2011
My role: Lead projection designer, programmer and live show visualist. I designed the playback and technology system for this new piece by choreographer Shen Wei. I also contributed heavily to some of the visual effect programming seen in some of the pre-rendered clips. Made with Max/MSP and VDMX.
Shen Wei – Limited States from Fake Love on Vimeo.
——————————–
Sonos – Playground and Playground Deconstructed – SXSW and MOMI NYC – 2013
My role: I was the technical designer of the hardware and projections for this audio reactive immersive piece. Red Paper Heart was the lead designer and developer on this project which they made with Cinder.
PLAYGROUND DECONSTRUCTED from Fake Love on Vimeo.
June 12th, 2013
Sonic Prints
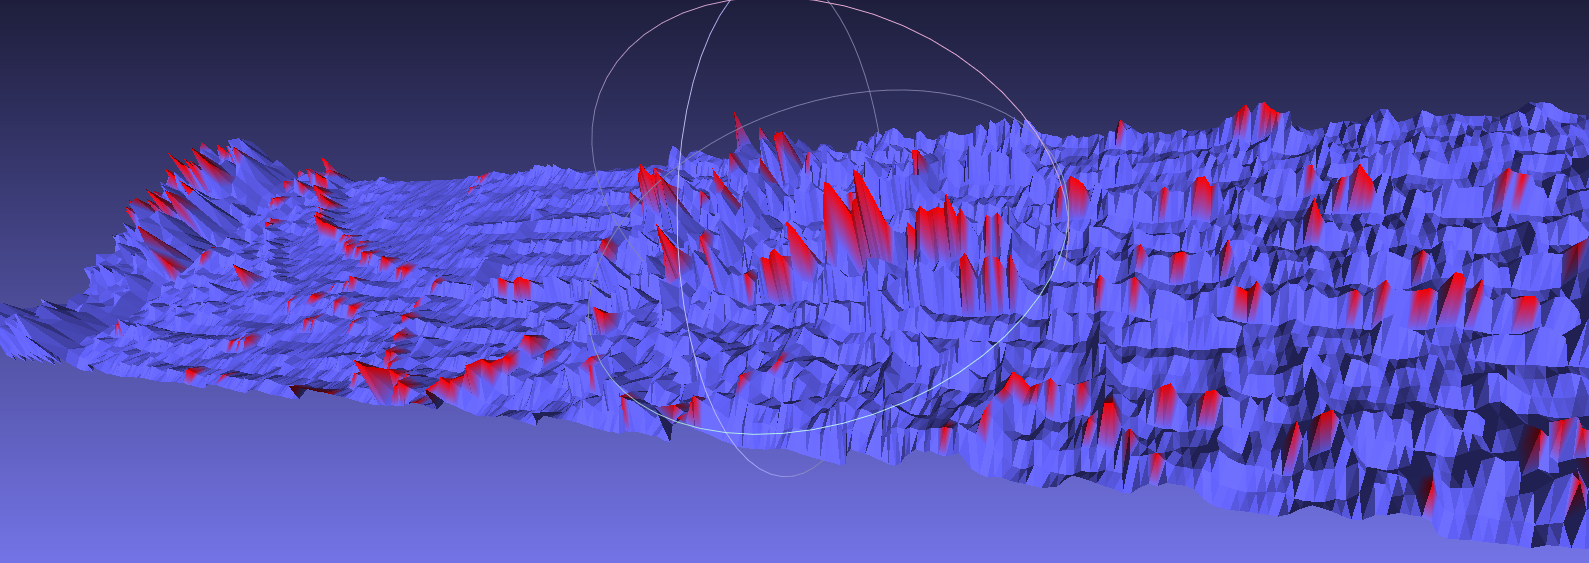
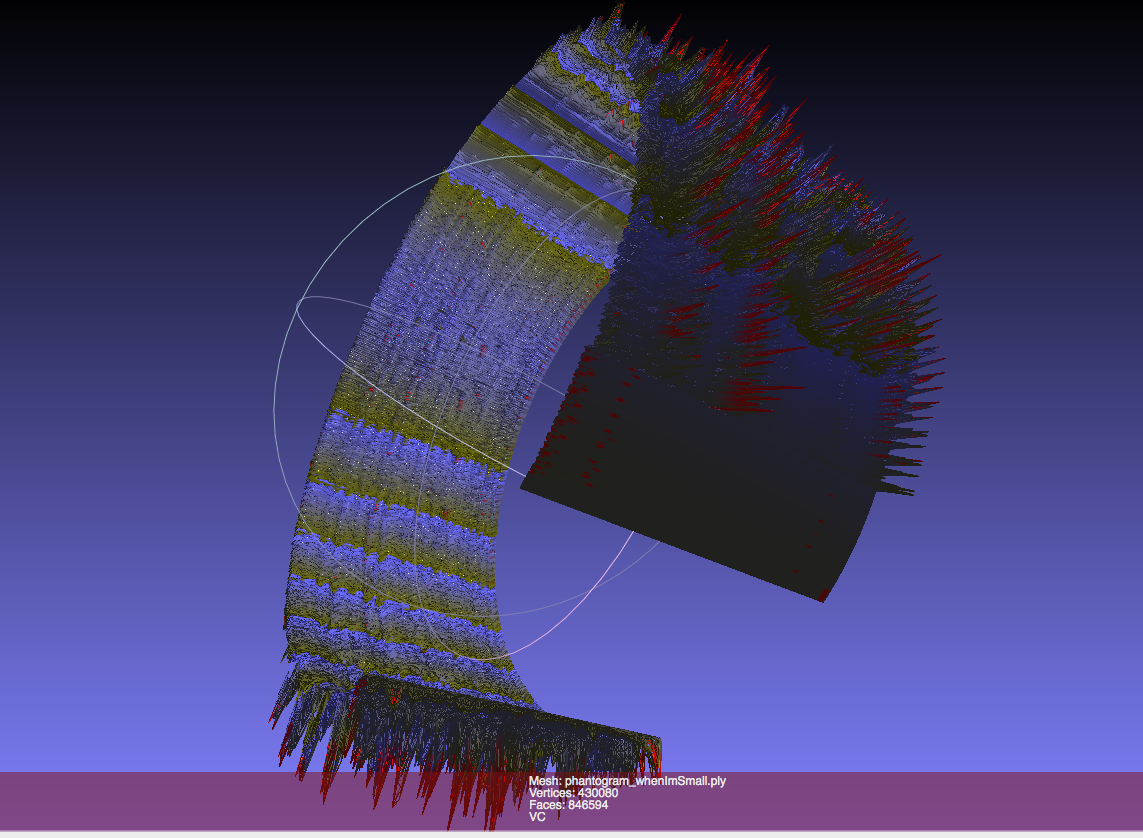
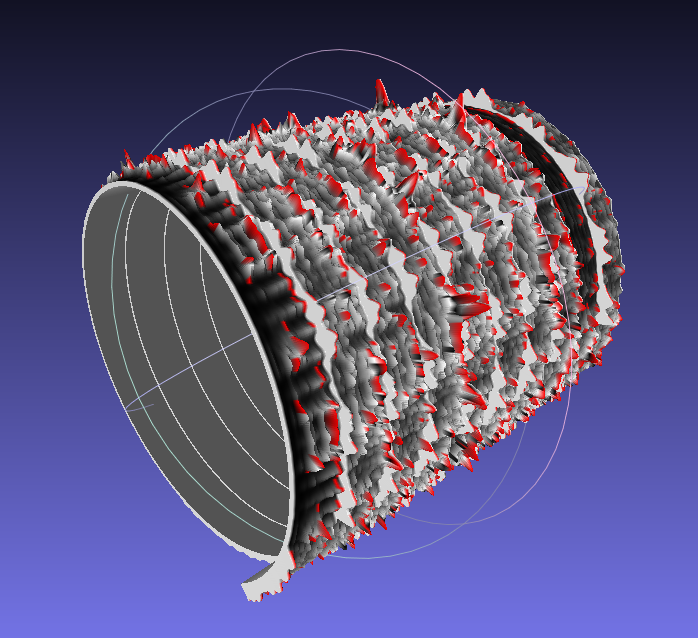
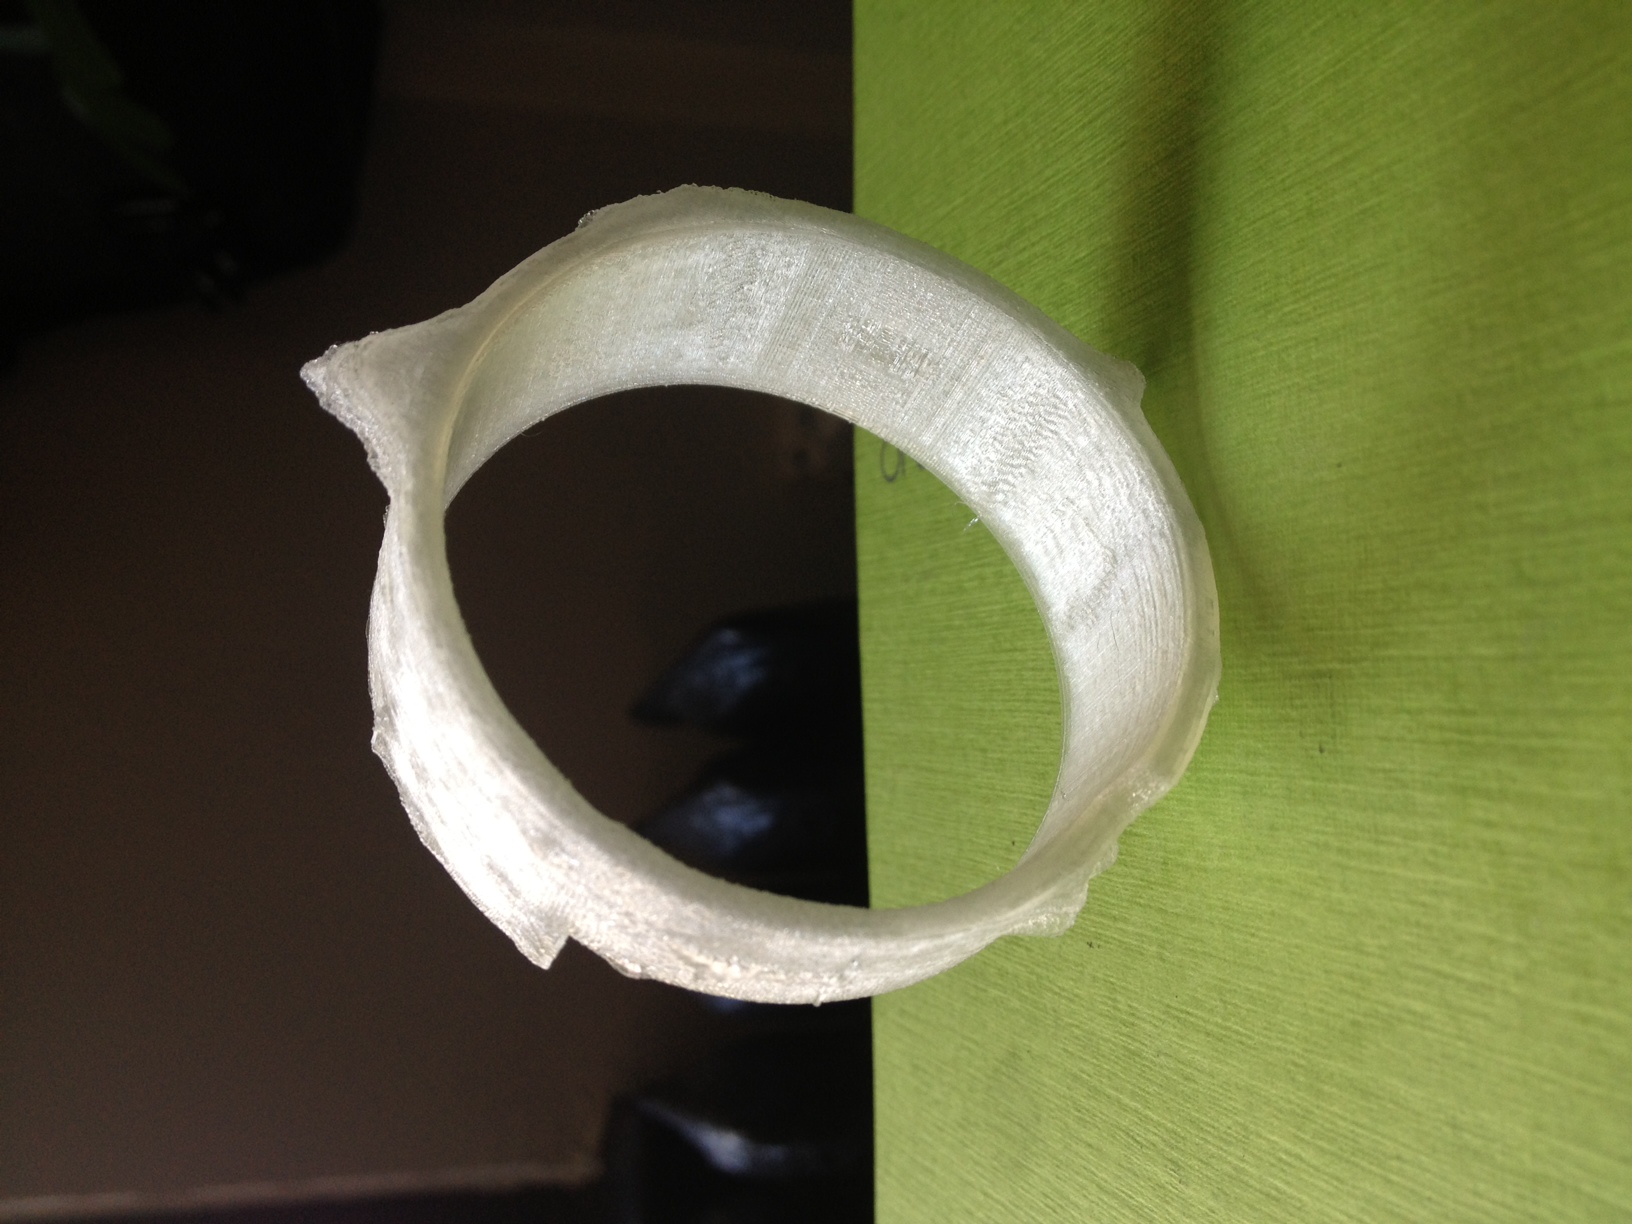
Using openFrameworks and ofxFFT to generate 3D Meshes of sound data for use in 3D printing.
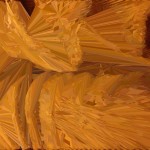
This is very much a work in progress, but just wanted to share some initial results while I work on the final visual output. I have done some initial prints (see below) but have found that I’d like to make some much larger prints to be able to really get the detail out of the generated models. This project is interesting for me because it allows me to look at the structure of a song in a different way than a musical score or just a volume intensity graph like we’re used to. I can also play with the idea of making physical objects out of songs in a different way than burning a CD, pressing a vinyl or etching a wax cylinder.
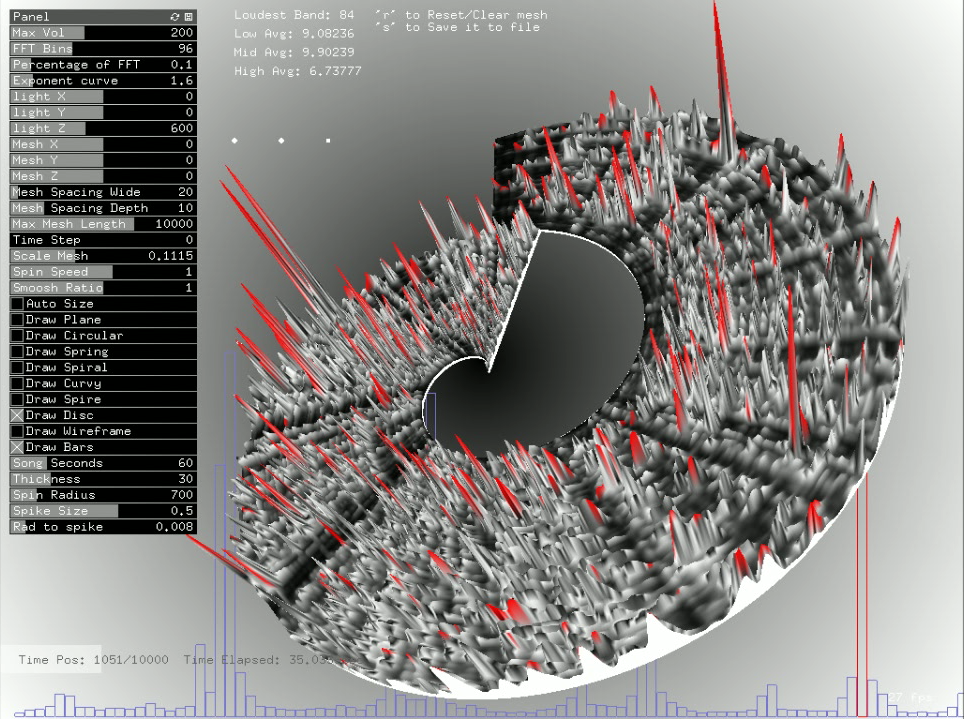
We will be releasing the source after I get rid of a few bugs and clean a few things up, just need time to make those adjustments. Then you’ll be able to tweak it and make your own 3D meshes for your own real-time music and sound input.
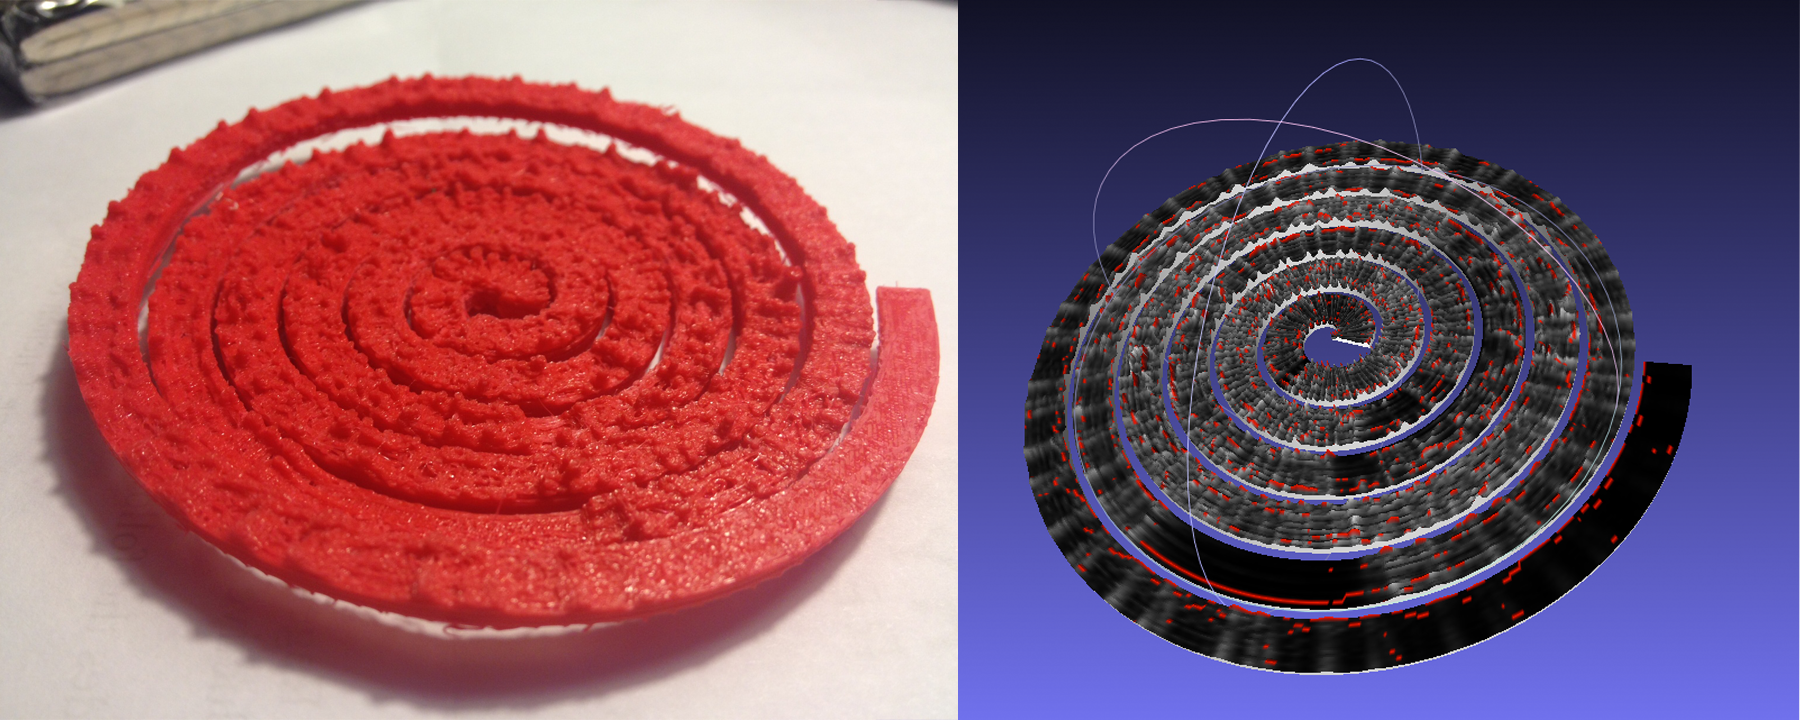
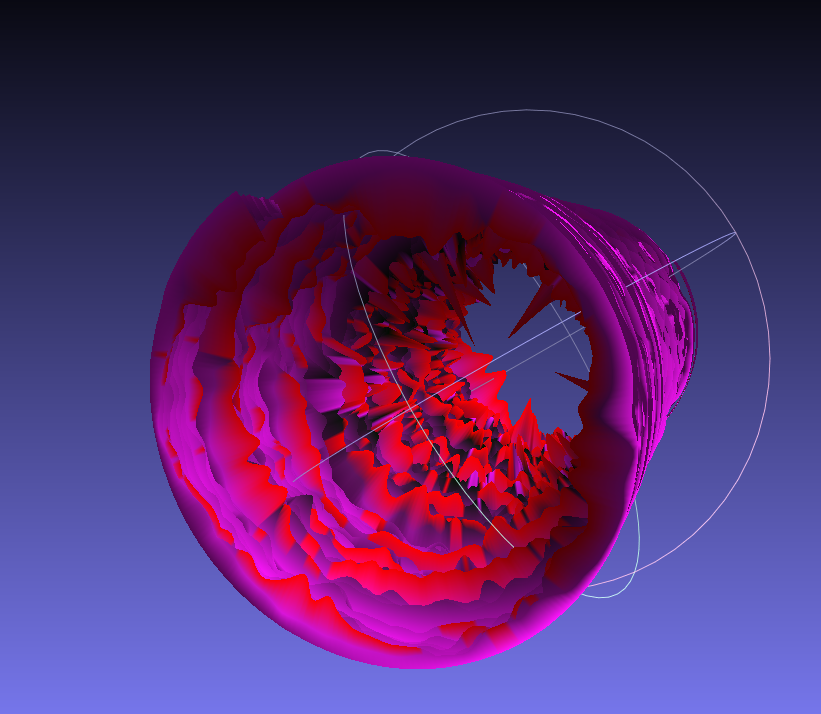
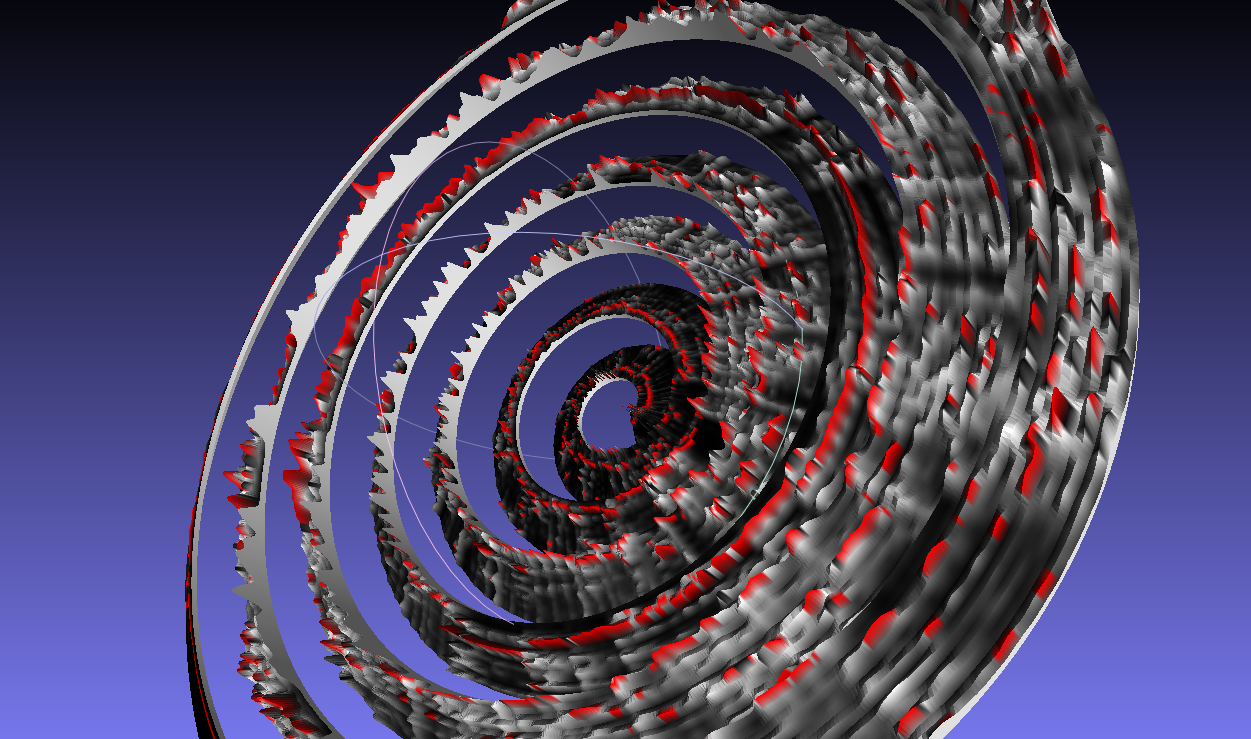
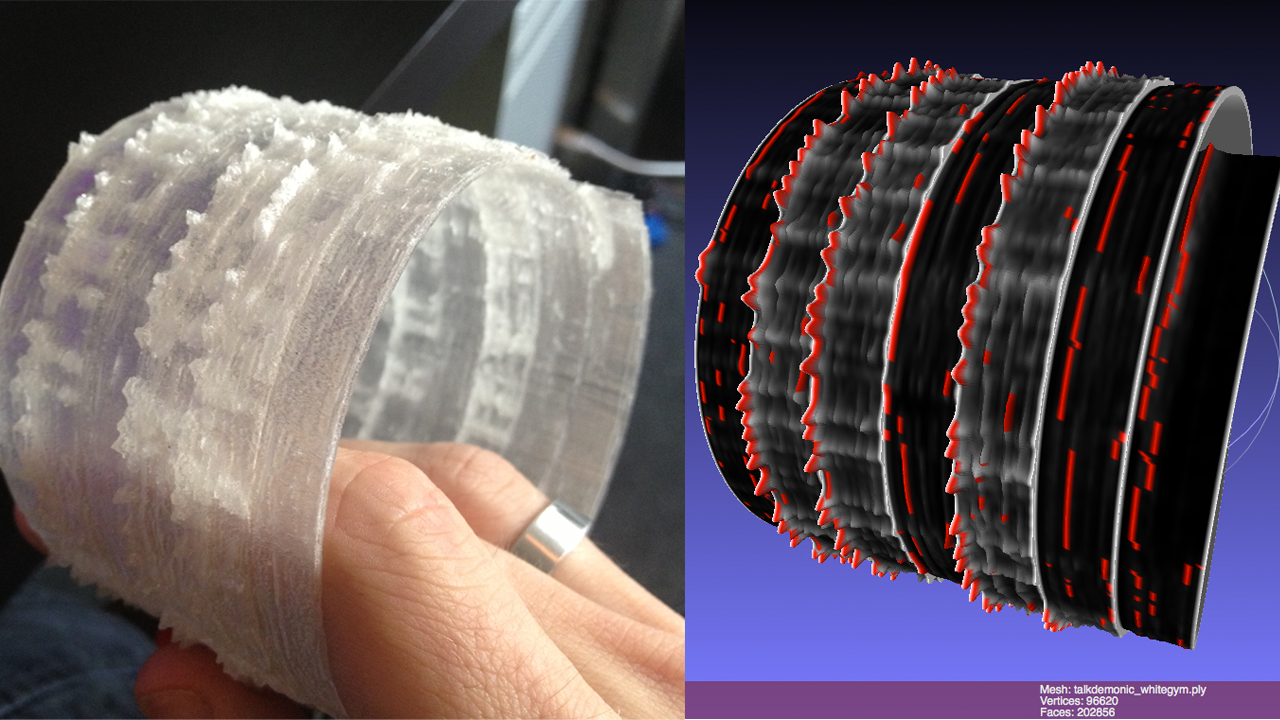
The meshes are set up like this: left is generally the bass/low end, right is high end. Red or orange marks are the loudest frequency band at that particular time. White to black shows the relative volume intensity of the particular time. I can adjust the number of frequency bands it is looking at and make it more coarse or fine.
If you would like one of the 3D mesh files to look at for yourself, I can send you a sample. The individual files are about 20mb so I don’t want to host them here yet.
You can see some images of sample prints below, they are about the size of a bangle or bracelet.
Sample prints now available on Thingiverse
I have been doing this as a personal project and a side project where I work: www.fakelove.tv
3DFFT Sonic Prints – Work in Progress from blair neal on Vimeo.
3DFFT _Sonic prints example – Son Lux – “Easy” from blair neal on Vimeo.
June 24th, 2012
Crayolascope
The Crayolascope – an Analog Depth Display from blair neal on Vimeo.
Using 12 toys from Crayola called “Glow Books”, I hacked together a charming prototype of what a ~1ft deep 3D display might look like. This would be a similar concept to animating some of those famous depth paintings on dozens of panes of lit glass.
Uses an Arduino Mega to drive it all.
For the animation, I traced a cube I had digitally animated and printed out, frame by frame.
You can control the speed, scrub position/frame, and make a fade effect.
The Crayolascope has been exhibited at the NY Hall of Science in Queens, NY as part of their series that teaches kids about different aspects of animation. It has also been shown at Launchpad in Brooklyn, NY as part of the Slap Dash art series.
For the next version, I’d like to play with more powerful lighting and more full edge lighting, as well as solve the issue of internal reflectivity between panels degrading the quality of the “image”. Once the animation goes in about 14-18 frames, it becomes very difficult to see from one side unless it is in a very dark space. I would love to get it much deeper than that, or at least make a finer Z-space resolution.
Press:
Engadget – http://www.engadget.com/2012/06/25/crayolascope-hacks-toys-into-foot-thick-3d-display/
Hack-a-day – http://hackaday.com/2012/06/24/crayolascope-turns-flat-displays-into-volumetric-coolness/
Makezine Blog – http://blog.makezine.com/2012/06/25/crayolascope-an-analog-depth-display/
April 15th, 2012
Crystal Eye – my first iOs app

Crystal Eye promo video from Fake Love on Vimeo.
At work I got the amazing chance to spend some of my free time developing a simple photobooth iPhone app called Crystal Eye. I wanted to try and make something that I hadn’t really seen before, and a lot of the effects on the App store seemed to be in the same sort of “overlay” style.
I’ve been interested for a while in making effects that are influenced by the content of the image and aren’t simply just overlaid with little regard for what is going on inside the image. Another goal was to create a fun, interactive tool that anyone could just pick up and use. The live tweaking aspect was also pretty important to me.
The app is still in a sort of early development stage with a lot of cool tweaks and extra effects to be made down the road. I also hope to make a variation soon that processes each image as a frame that can be reassembled to a weird rotoscope style video.
Made with openFrameworks. Coded by me and Caitlin Morris. GUI design by Layne Braunstein.
April 23rd, 2011
Banjo or Freakout – Idiot Rain
This video came out about a week ago on NME.com but I wanted to make sure I put it up here as well.
After seeing my video for Braids, Banjo or Freakoutt approached me about doing a video for his upcoming single “Idiot Rain.” My process for this video was much easier than it was for the Braids video. Since the song had a more straightforward structure it was fitting to transcribe more of a narrative to it. The entire video only took 6 days to make, from shooting to completion. I had done some test shots and such beforehand, but it was amazing to me that everything fell into place so quickly…especially when I did camera, editing and post production/effects. It was just nice to have a cohesive idea right off the bat. Also nice to have a super helpful set of friends to blow a saturday walking around Red Hook with a suitcase and a dog.
Like most of my videos I’m not sure if I could explain any deeper meaning behind this video…but I think it offers some interesting interpretations.
January 27th, 2011
Braids – Plath Heart video release
Braids
Kanine Records
Flemish Eye
Whew…after over a month of hard work shooting, editing and shooting and editing, my video for Braids’ song Plath Heart has finally been released into the wild. It is my very first official music video and I’m really excited that I got to work with such a talented group.
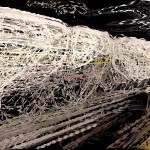
This video really embodied ‘experimental’ for me, mostly due to how I approached the project. The song has a very unusual structure to me, so it was very hard to fit a kind of story line to it. I was stuck initially when trying to figure out the visual piece of the song. Luckily, after meeting with the band, I was able to pick out a few phrases and ideas that they claimed they could ‘see’ as part of the song. Some of the key phrases that stuck out were “metallic”, “detailed”, “birth” and “tunnel”. I also asked for what they saw as the color palette of the song, and stuck to that as much as possible.
Then for weeks I played around with strange filming techniques and materials. I ended up with about 2 hours of footage by the end of everything. I wanted to keep the video as immediate as possible, to stick to some of my expertise as a live visualist. I spent hours just laying down clips that I had shot and just sort of building everything from the ground up, without a clear vision of where I was going to end up. In some ways, I think that helped the piece, but it made it incredibly difficult to start off. I wanted to be able to communicate something powerful without putting together a complete “storyline” in my head, so that I could match the way I felt about the song. I’m so used to just letting things happen by chance, so it was hard to come back and apply a little more control to a piece. A lot of things were still kept to chance…strangely enough, even through 13 different versions and edits, the first 40 seconds or so ended up staying the same from the very first version.
I wish I had some photos of how i got some of the shots I did, some of it would be pretty comical. Instead of ruining the magic for the whole thing, I’ll explain one of the main shots. Even I was surprised about how the ‘water’/’flashing lights sections turned out since they looked so otherworldly, but it was a very simple setup. For that shot, all I did was set my camera pointing up on my record player and turned it on…and then dangled some tinsel which was backlit by a flashlight. That random experiment ended up being the bookends of the entire video. I’m glad I had to make this video around the holidays, because I was able to stock up on things like tinsel, battery powered christmas lights and other unusual metallic materials. Another shot involved macro shooting of a glass bowl of milky water that happened to fit perfectly on top of my desk lamp.
Overall I feel really satisfied with the way the video came out. It was a battle between editing for microscopic musical events while keeping a view on the larger picture. In the end it was a lot of shuffling around different events until it became very fluid. I couldn’t really explain the ‘story’ in words if you asked me, but I’d say most music videos I like would get a similar comment from me. In the end, the video is open to a lot of different interpretations, just like the song.
UPDATE:
Some really great reviews coming in about the video…so many different interpretations that I haven’t even imagined. From an analysis of Sylvia Plath’s relationships, and sasquatch’s intestines to just traveling down a “hairy tube”
Here are some links:
Pitchfork
Much Music
ChartAttack’s Video of the Day
http://www.veoba.com/blog/watch-braids-plath-heart
PrefixMag
Exclaim.ca
Noiseography
January 20th, 2011
Demo Reel 2011
I finally put together a demo reel of a bunch of my previous work, most of which you can find in the rest of my portfolio. It includes some of my live visuals work, some of my interactive installation work, and a few of my music videos (both official and unofficial). I’ll be adding onto it eventually. All of the material on the reel was shot, edited, programmed, and tweaked by me.
November 16th, 2010
The Wobbulator
I was finally able to cobble together a video for Nam June Paik’s Wobbulator. It was one of my favorite pieces of equipment during my residency at the Experimental Television Center, and I was confused about why there wasn’t a lot of information out there about it on the web. There are a few grainy youtube videos but they don’t show a lot of the exterior of the device or any of the real time manipulations, so I wanted to make a little educational video. Most of the Wobbulator’s source images in this video were either from a camera pointed out a window, or just from straight video feedback.
For a lot more information, check out the Experimental Television Center’s website in their Video History Project area. There are tons of great articles on early analog video tools and techniques, but in particular there is a very detailed article on the wobbulator. Just to give you some more info, here is the first paragraph of the article on the device:
A raster manipulation unit or ‘wobbulator’ is a prepared television which permits a wide variety of treatments to be performed on video images; this is accomplished by the addition of extra yokes to a conventional black and white receiver and by the application of signals derived from audio or function generators on the yokes. The unit is a receiver modified for monitor capability; all of the distortions can thus be performed either on broadcast signals or, when the unit is used as a monitor, on images from a live or prerecorded source. Although the image manipulations cannot be recorded directly, they can be recorded by using an optical interface. The patterns displayed on the unit are rescanned; a camera is pointed directly at the picture tube surface and scans the display. The video signal from this rescan camera is then input to a videotape recorder for immediate recording or to a processing system for further image treatment. The notion of prepared television has been investigated by a number of video artists and engineers; this particular set of modifications was popularized by Nam June Paik.
I also made a quick music video with the wobbulator as a key component…check it out here
For more on my experience at the experimental television center check out a few of these links
[1] [2] [3] [4]
This video is now featured on Rhizome, Create Digital Motion, Hack a day, Makezine, Wired and Notcot among others
September 1st, 2010
Trip[tych]
Fall 2009
In preparation for my thesis show, I began developing a series of pieces involving different uses of live visuals in relation to music. I was particularly interested in the fact that in many cases the visuals were being led by the music, that is, they were representing the music without having the music react to them. This process seems broken to me, so I tried to think of an idea that was more of a feedback loop.
Trip[tych] treats the visualist as the conductor of the overall musical action. Three musicians sit behind see through scrims that are projected on. The musicians are only allowed to play while their particular screen is lit up in front of them. While the musicians are improvising off eachother, they are also supposed to be working off of visual cues being projected in front of them. The visualist is also reacting live to what they are playing, so dynamic changes are seen and heard very fluidly. The use of scrims also solved a problem I was having with projecting on a rectangular screen and how that disconnects the projection from the performers. By setting up the projection in this way, I was able to create a multilayered space with the musicians in between. The content of the projections was based on a late night cab ride I had back from a show in NYC.
The first performance of Trip[tych] was at the West Hall Auditorium at the Fall 2009 MFA show. It featured Kyle McDonald on drums, Will Rogers on saxophone, and David Rhoderick on guitar effects pedal. It was also performed at my thesis show, Overflow.
You can read more about Trip[tych] in my thesis.
2 Comments »