November 2nd, 2014
We’re Live – Live TV Face Substitution
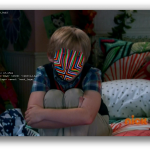
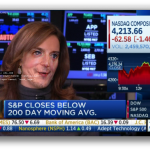
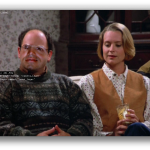
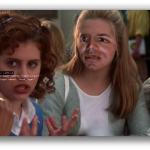
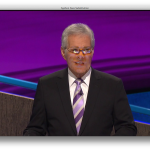
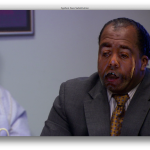
We’re Live is a project involving live HD cable TV and face substitution software. It is a hardware and software method for doing a real time facial composite/replacement on live television. The original face substitution implementation and cloning shader was created by Kyle McDonald and Arturo Castro in 2012 (link to Github source). The face tracking algorithm that enables this kind of high quality facial substitution was developed by Jason Saragih.
One of television’s greatest powers is in its ability to display very structured and edited views of reality. By watching the fabricated streams of the shows, viewers begin to wish for the interesting, exciting and impossible lives of the characters. They can subconsciously desire the smiles and trouble free lives enabled by buying the products in the advertisements. With this software, viewers can come one step closer to truly seeing themselves on screen.
We’re Live allows a user to composite their face (or any face they choose) onto a live television stream. Essentially, anyone you watch on TV can finally look like you….or anyone you want. You could make everyone on TV look like Bill Murray if you really wanted to.
Download of the software is available in the Technical details section


We’re Live – Live TV Face Substitution from blair neal on Vimeo.
————
Technical details/process:
The first part of the process involves actually getting the live TV into your computer so you can process it for face substitution. I have been using the following:
Blackmagic Mini Recorder
Orei 1×2 HDMI Splitter – strips HDCP
Alternate to the Orei Splitter
The HDMI Splitter is the silver bullet for actually capturing live TV off a digital set top box. Most set top boxes and game consoles have what is called HDCP or High Definition Copy Protection which blocks you from…well…copying or recording the HD signal which is something we could potentially do with this setup. The Blackmagic Mini Recorder does not comply with HDCP, so your set top box signal will not even show up when you try to just plug it in straight. Certain HDMI splitters, (like the one listed) will comply with the HDCP handshake on their input, but ignore it for their output – these splitters effectively strip HDCP so you can do whatever you like with the signal.
Once you have Set top box HDMI-> HDMI Splitter -> Black Magic Mini Recorder -> Thunderbolt -> Mac Computer – you can start doing some face substitution!
–DOWNLOAD–
Here is a ZIP of the software with an included VDMX project file for working with it (OSX Only):
Syphon_Face_Sub_v1.0.zip (210 downloads)
Usage:
VDMX is my software of choice for actually getting the captured signal from Blackmagic into the face substitution software. I have included a VDMX Project file with the software to show you how to do this all yourself. With my setup, I am able to get 1280×720 at 60hz (or 720p@59.94 according to the actual capture settings I’m using)
Once I have the TV signal in VDMX, I actually pass the video texture to the face substitution software using Syphon. Once it is in there, it is constantly searching for new faces to map the mask layer onto. You don’t have to use a live TV signal – you can put a movie file into VDMX onto the “camera layer” source and use that layer to apply your masks to.
On another layer in VDMX, you can pass in the “mask” you want to apply to the footage. For example – this would be your face that you pass in via webcam. To save processing time and not run 2 face trackers constantly – I actually have this capture your face on a key press – when your face is in camera – you press the ‘m’ key in the face sub software to set the new mask. You can put still images or movies or a live webcam into the “masks” layer in VDMX. Alternatively – you can put a bunch of files into the “faces” folder in the “data” folder and use the arrow keys to cycle to different faces.
You can press ‘d’ to bring up the GUI for different settings like viewing which mask is currently loaded and things like that.
Recording/Displaying output:
You can capture the output of the openFrameworks program in Syphon as well, and use that to go fullscreen in VDMX or something if you hide those layers. I use the Syphon Recorder to record my demos.
Note about Audio:
Currently nothing in this setup fully supports audio. You can capture audio with the Black Magic recorder and use that as your audio source in Syphon Recorder — but a caveat:
The audio is “ahead” of the video due to input and processing steps – meaning you will hear something 6 frames (0.2s) before you see it (for example – your results may vary). To fix this – you could make an audio delay buffer in something like Max/MSP. If you are recording output with audio – you will need to re-sync it later in your editing software – I recommend a clap board or hand clap at the beginning of recordings – something recognizable for sync in video and audio.
Alternate version/Upgrade: There is an alternate version of the software that isn’t fully integrated yet into this executable/binary (but the source is available on github under the OriginalCycling branch) – which will allow you to map arbitrary textures to the live tracked face. This released current version only allows you to put a face on a face. The other version lets you put more abstract non-face things and map them onto the same area. It works by storing the mesh points of a pre-tracked face, and using those to apply an arbitrary image to the face mesh that is properly texture mapped. This alternate versions also features a way to crossfade between different faces.
March 22nd, 2014
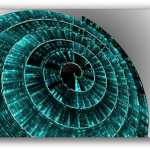
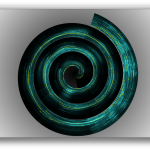
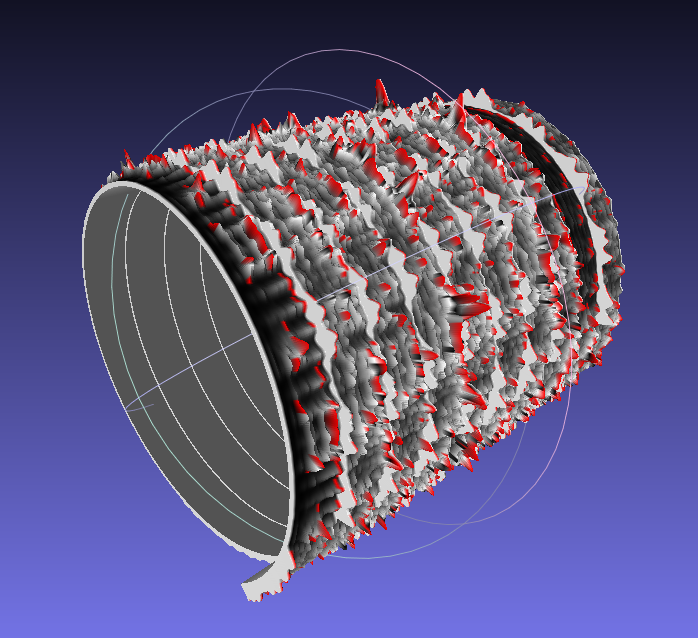
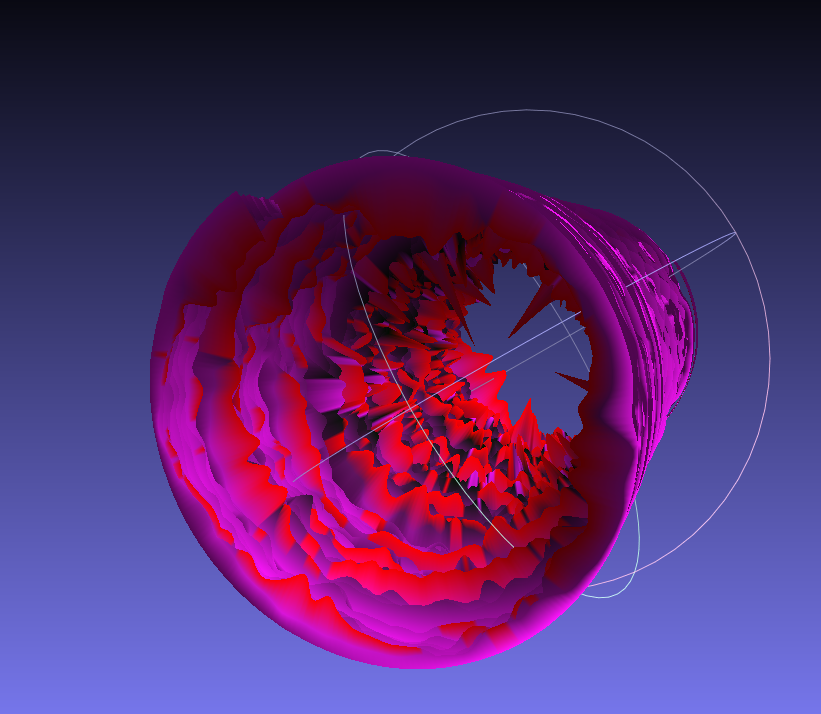
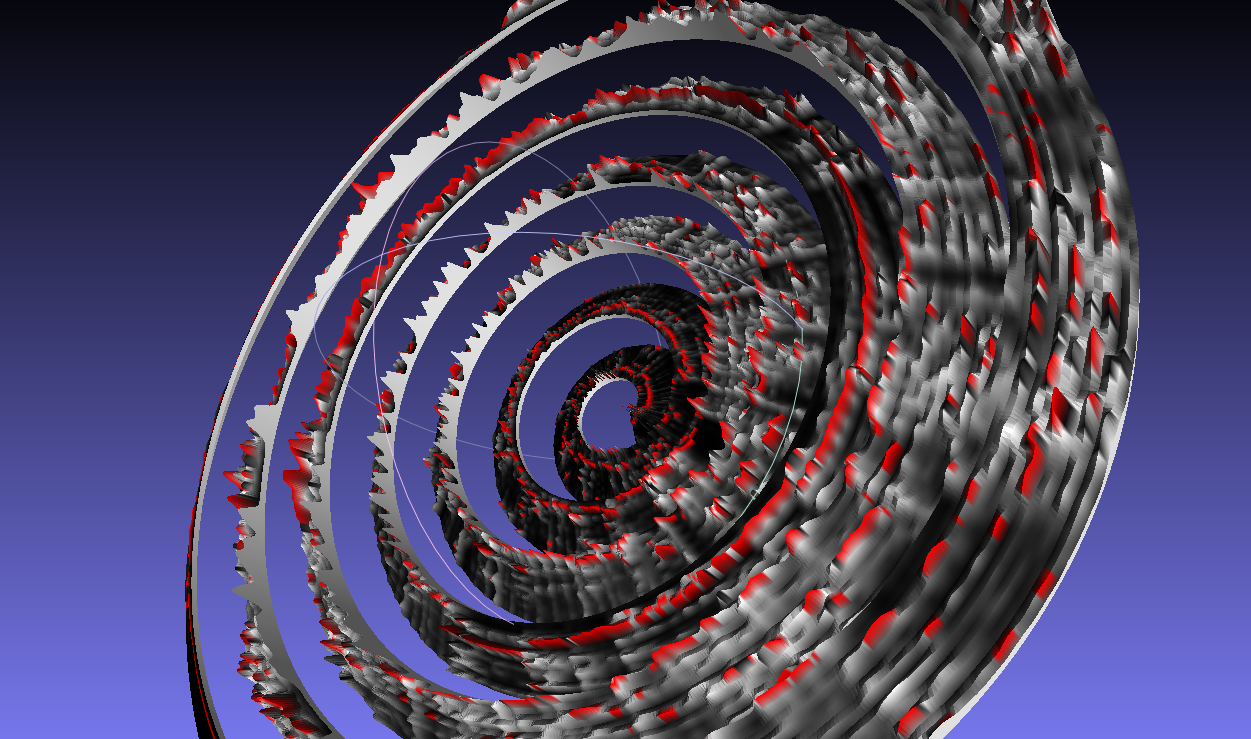
3DFFT Sonic Prints new samples
(Video and Physical prints of project here)
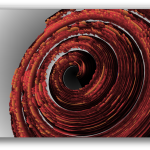
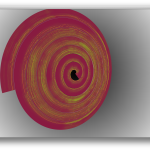
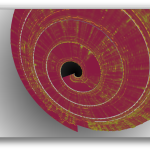
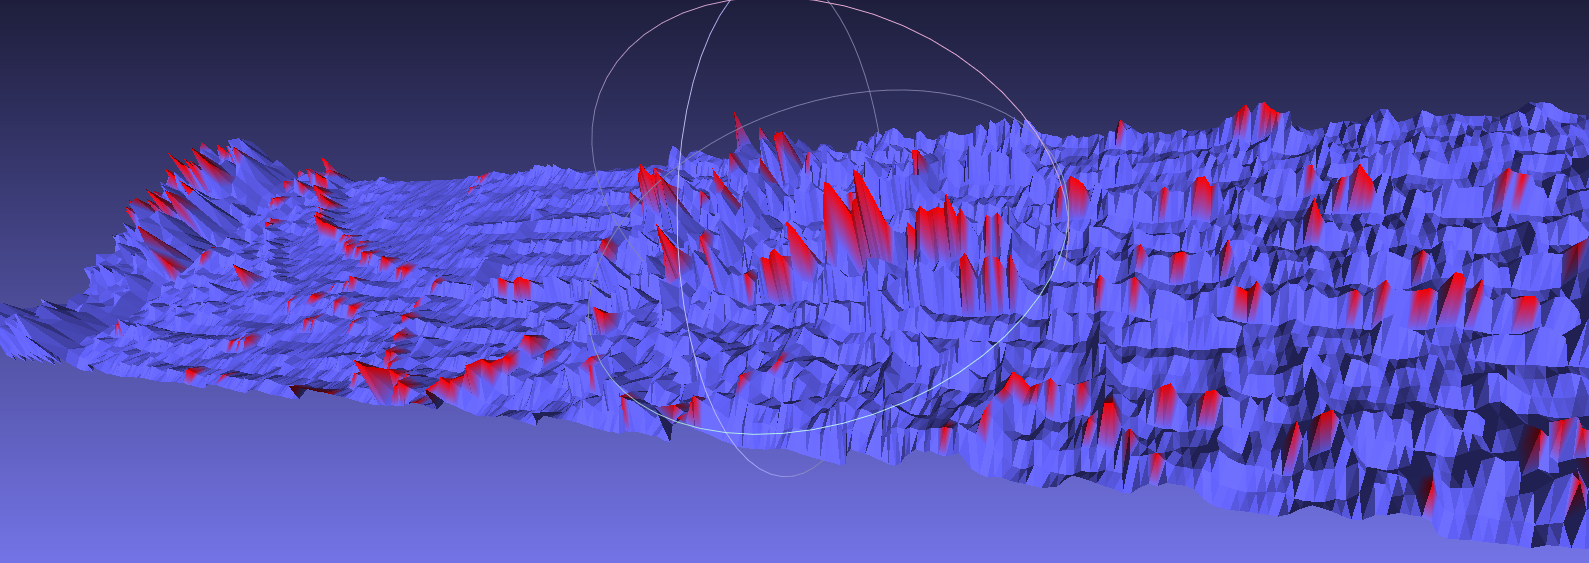
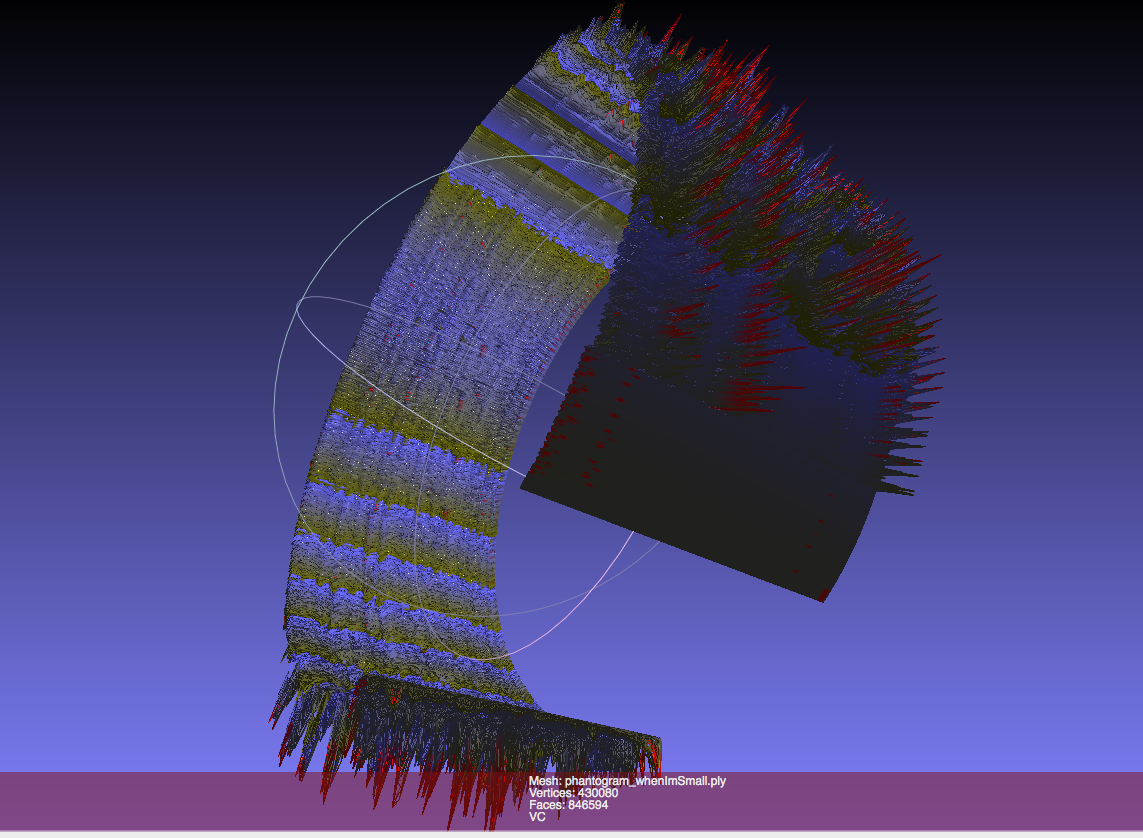
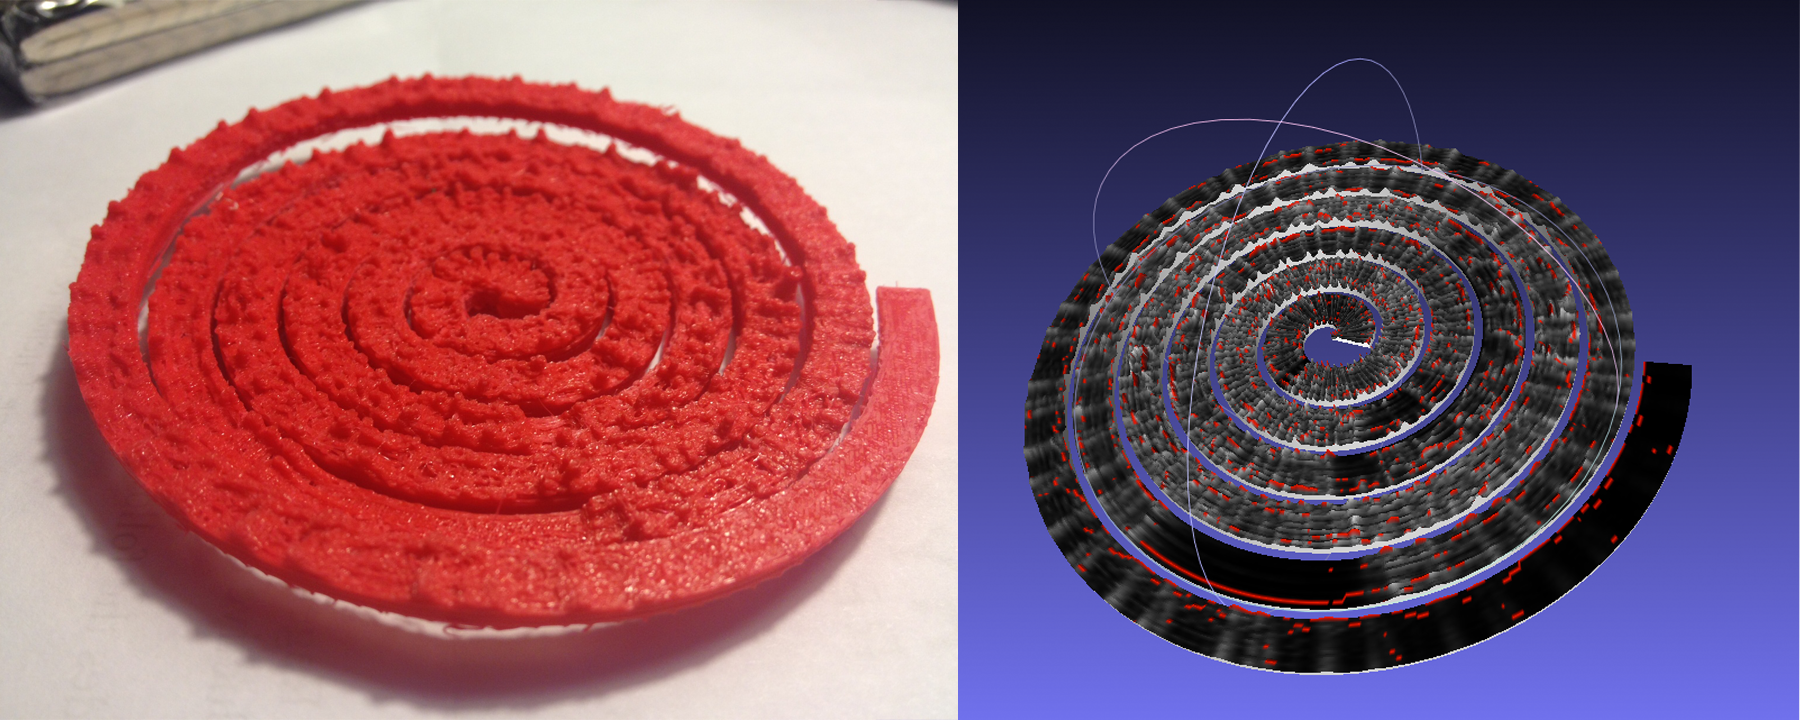
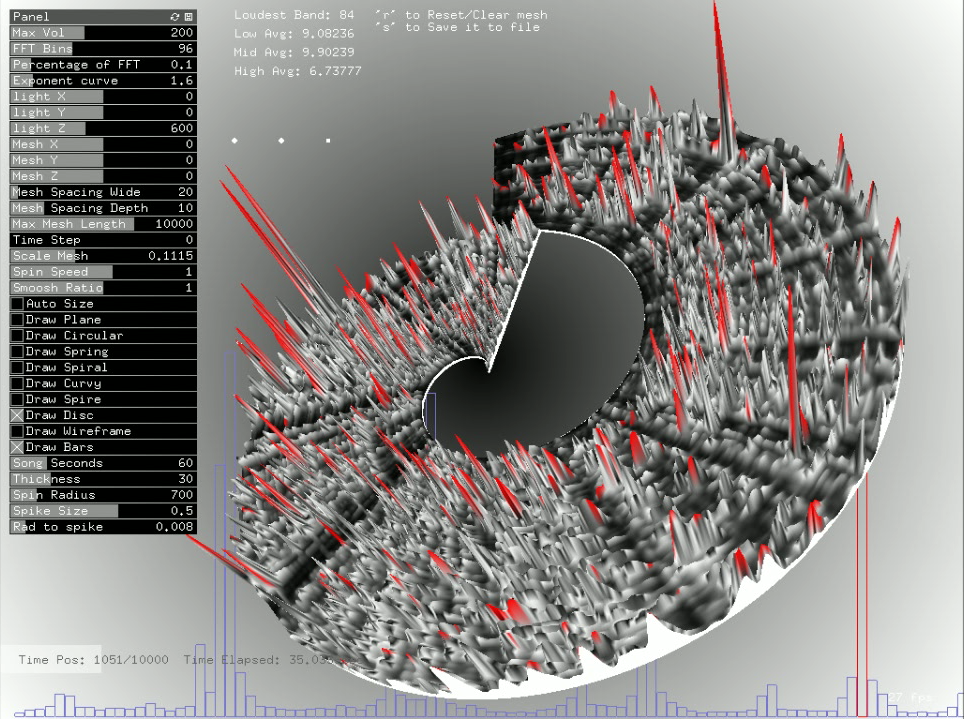
I’ve continued to play with my 3DFFT software that takes incoming audio and generates a 3D mesh from the FFT information. I’ve been playing with some different types of music and gotten some really nice varying results. Some slow ambient songs are like dragging a paintbrush in a circle (Hammock), while more rhythmic songs have more of a stippling pattern (Haim and Animal Collective). These results were normalized but with a little too much of a hard cutoff, I’m trying to get a look for these that keeps them from exploding too much, but still keeping a little more texture. Doing selective coloring really makes a difference as well. I’m hoping to make some more physical renders of these in the near future with a CNC instead of a 3D printer so that the larger size can enhance some of the details. I also hope to work out the kinks soon so that I can release the code for other to use for making their own sound prints.
-
- Hammock
-
- Haim – Falling
-

- Lorder – Buzzcut Season
-
- Hammock
-

- Animal Collective – My Girls
-
- Amiina – Fjarkanistan
-
- Hammock
-
- Lorde – Buzzcut Season
-
- Haim – Falling
-
- Hammock
June 12th, 2013
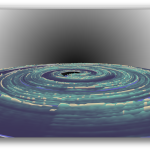
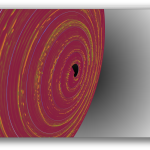
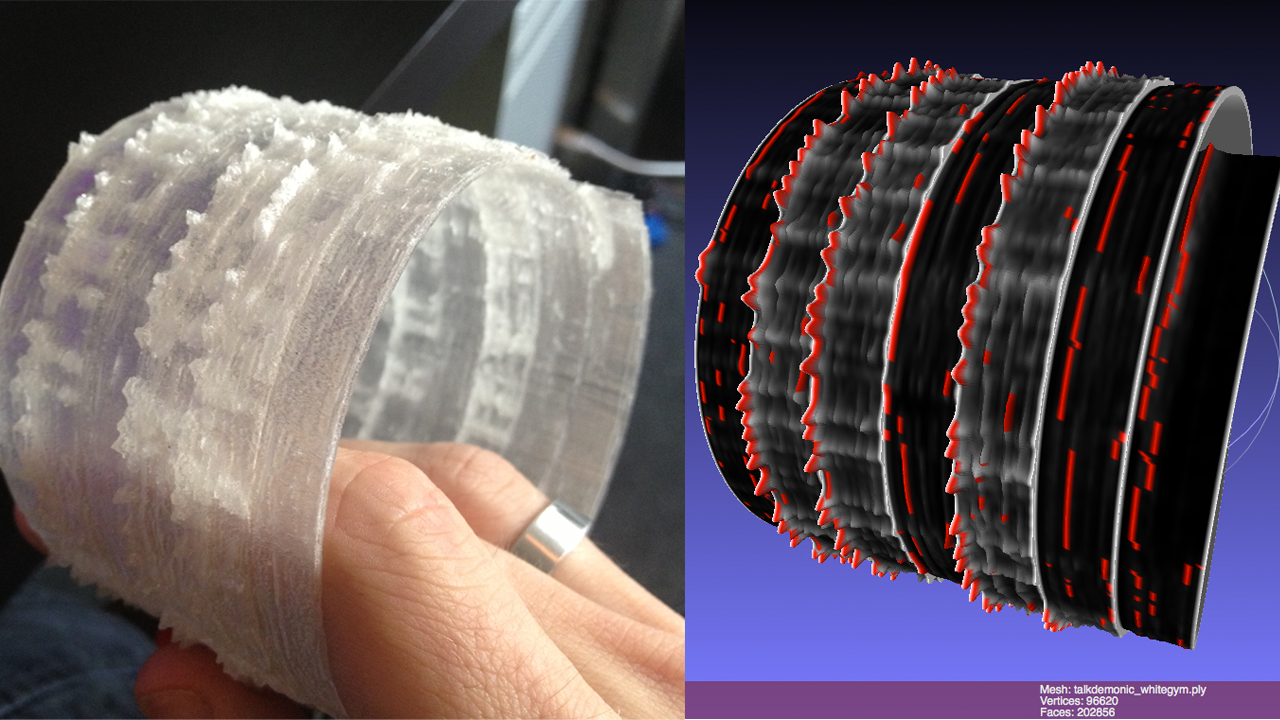
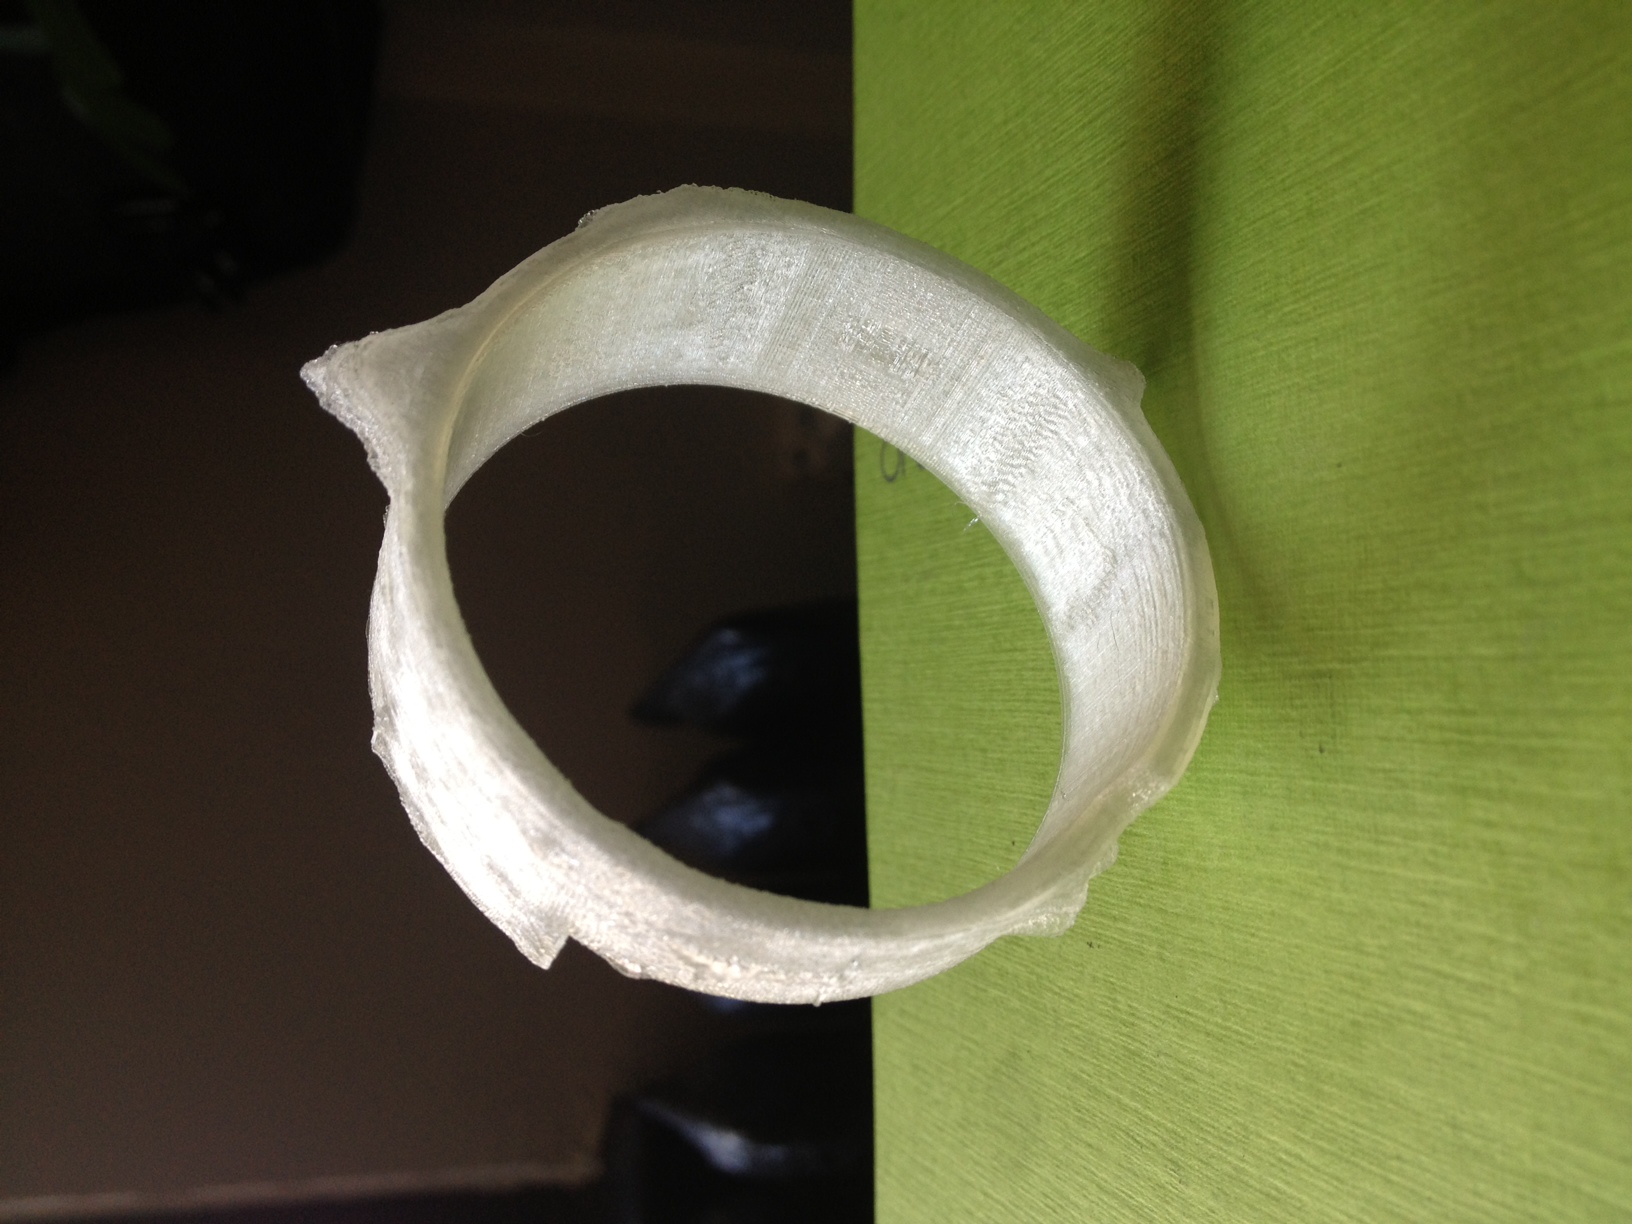
Sonic Prints
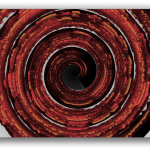
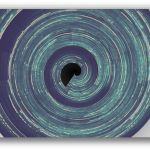
Using openFrameworks and ofxFFT to generate 3D Meshes of sound data for use in 3D printing.
This is very much a work in progress, but just wanted to share some initial results while I work on the final visual output. I have done some initial prints (see below) but have found that I’d like to make some much larger prints to be able to really get the detail out of the generated models. This project is interesting for me because it allows me to look at the structure of a song in a different way than a musical score or just a volume intensity graph like we’re used to. I can also play with the idea of making physical objects out of songs in a different way than burning a CD, pressing a vinyl or etching a wax cylinder.
We will be releasing the source after I get rid of a few bugs and clean a few things up, just need time to make those adjustments. Then you’ll be able to tweak it and make your own 3D meshes for your own real-time music and sound input.
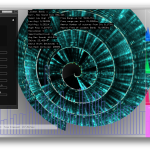
The meshes are set up like this: left is generally the bass/low end, right is high end. Red or orange marks are the loudest frequency band at that particular time. White to black shows the relative volume intensity of the particular time. I can adjust the number of frequency bands it is looking at and make it more coarse or fine.
If you would like one of the 3D mesh files to look at for yourself, I can send you a sample. The individual files are about 20mb so I don’t want to host them here yet.
You can see some images of sample prints below, they are about the size of a bangle or bracelet.
Sample prints now available on Thingiverse
I have been doing this as a personal project and a side project where I work: www.fakelove.tv
3DFFT Sonic Prints – Work in Progress from blair neal on Vimeo.
3DFFT _Sonic prints example – Son Lux – “Easy” from blair neal on Vimeo.
February 25th, 2013
Doggifer

Doggifer is an application that saves or tweets animated gifs of your pet’s movement’s throughout the day. It can also just be a general use toy for collecting automatically triggered animated gifs. You will need to set up a twitter account to use the twitter portion of the app. Instructions for setting that up are included in the readme file accompanying the app.
Download Here: Doggifer v4 (429 downloads) (Only tested on OSX 10.6.8 but will run all day on a 5yr old laptop)
You can see my dog Margot when we set up the cam at home @doggifer on twitter.
Doggifer is made with openFrameworks and uses ofxUI from Reza Ali and ofxGifEncoder from Jesus Gollonet and Nick Hardeman.
You can grab the source of Doggifer on my github and change stuff up as much as you’d like. Originally made with OF0073. Let me know if you have suggestions and I’ll do my best to add them. Let me know if you catch any good shots!
If you do use Doggifer, I’m not personally asking for any compensation, but I (and many animals!) would really appreciate it if you donated to a local animal shelter instead. There is a very deserving no-kill shelter ( Sean Casey Animal Rescue ) in NYC that I’m a fan of and they would certainly appreciate your donations!


Doggifer by Blair Neal is licensed under a Creative Commons Attribution-NonCommercial-ShareAlike 3.0 Unported License.
June 24th, 2012
Projection abstraction #1
Projection Abstraction #1 from blair neal on Vimeo.
Playing with a laser pico projector, quartz composer, and some colored gels
March 27th, 2011
Quick update
Haven’t posted much in a while. I recently completed some touring visuals for Hooray for Earth and got to play with them live here in Brooklyn. I also just wrapped up a music video for Banjo or Freakout’s song Idiot Rain which will be debuting any day now. Here is a screenshot of that:

Slowly putting together something for a sort of “projection mapping how to” to the best of my abilities. In the meantime, I’ve been working on my own projection mapping project with a buckyball shape. Building everything in quartz composer with a lot of Kineme and 1024 plugins…then eventually will farm everything out to VDMX for any other live elements. I’ll hopefully be able to share any useful pieces I make as well, but the kineme and 1024 things make stuff work so nicely already that it’s hard to improve anything. Here some pics of what I’ve got as some test setups:
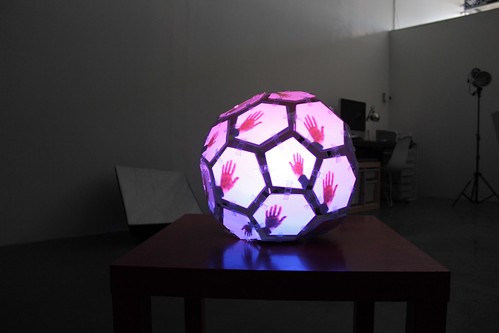
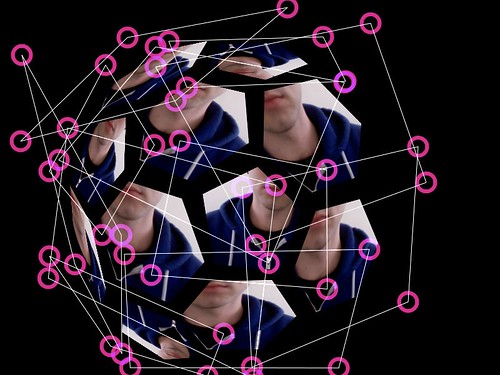
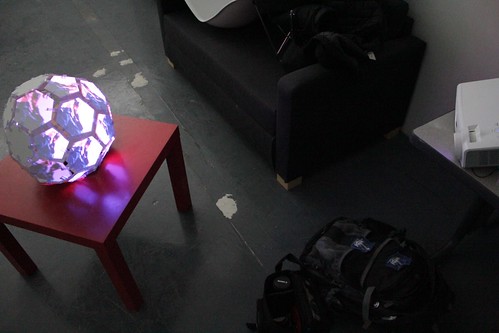
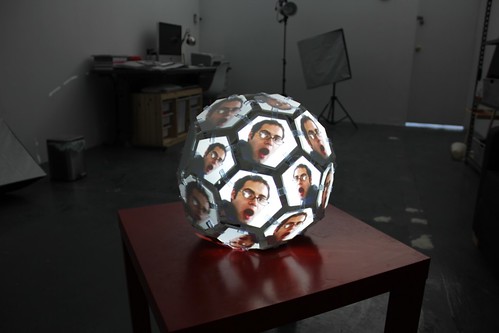
And the rest here
December 19th, 2010
Jit.freenect examples
Download the patch here: Jit.freenect examples (2628 downloads) (or right click and select “Save as”)
Using Jean-Marc Pelletier’s amazing Jit.freenect grab tool I was able to join in on the Microsoft Kinect party. I haven’t made anything nearly as impressive as the myriad of videos flying around youtube and vimeo, but it was fun to play with the depth information for the first time.
I’m more of a max/msp guy, so I just threw together a few examples based on what came to mind in the first few hours of playing with one. Haven’t really touched it with Openframeworks or anything like that yet, but that’s definitely the tool of choice for most people. The first time I played with the tool in Jitter, I had trouble getting the right kind of data treatment in order to get interesting looking things, but this time i was able to cobble together things based on suggestions from users on the Cycling 74 forums. Hopefully my simple experiments will be helpful to someone else. Unfortunately, I was borrowing my kinect so I’m sort of flying blind in terms of updating the example. Hopefully I didn’t break anything when I cleaned it up…
In the example you can get a slice of the depth info and use that as a simple controller, you can control a goofy theremin, map the depth info onto 3d nurbs, and colorize the depth info.
Screenshots are below…I have video, but it’s not very interesting, so a photo will have to do.
(CLICK FOR LARGER VERSION)


October 20th, 2010
The biggest video feedback loop in the world
I’ve been trying to think of ideas for my time at the Experimental television center next week and haven’t come up with anything too great yet, but I was thinking about the look of analog video feedback and thought it could be nice to try and make a gigantic video feedback loop. it would start in Owego (where the center is located) and send a camera feed it to one set of friends via skype and then to another/another etc. and back through the internet to another computer at the center that passes it through some of the analog equipment. This would keep looping and hopefully be recorded by people at each pass and then we could edit together some documentation after the whole thing finishes. Anyone have any other good ideas? Image of the flow idea is below…took me a while to think through it since skype can’t do two video chats at the same time.

2 Comments »